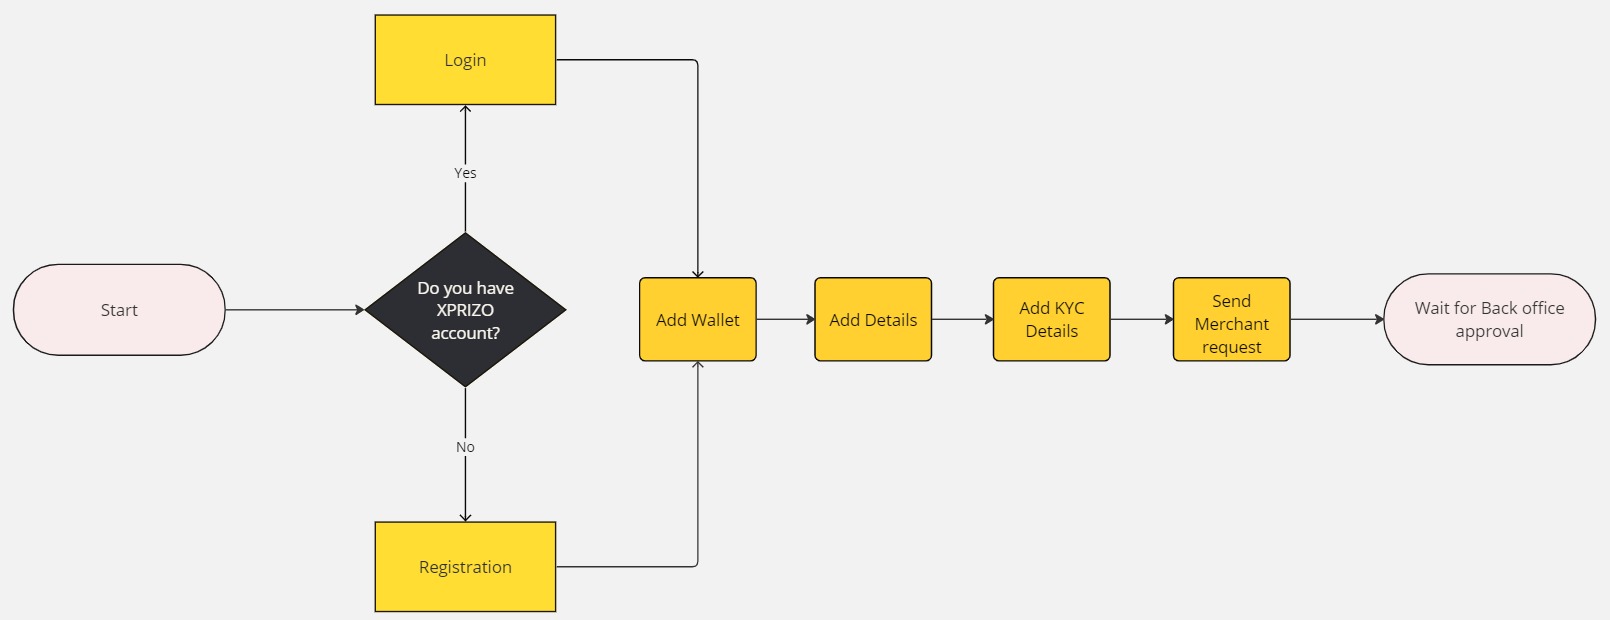
# How to become a Merchant?
[](https://books.xprizo.com/uploads/images/gallery/2024-01/user-journey-mapping-15.jpg)
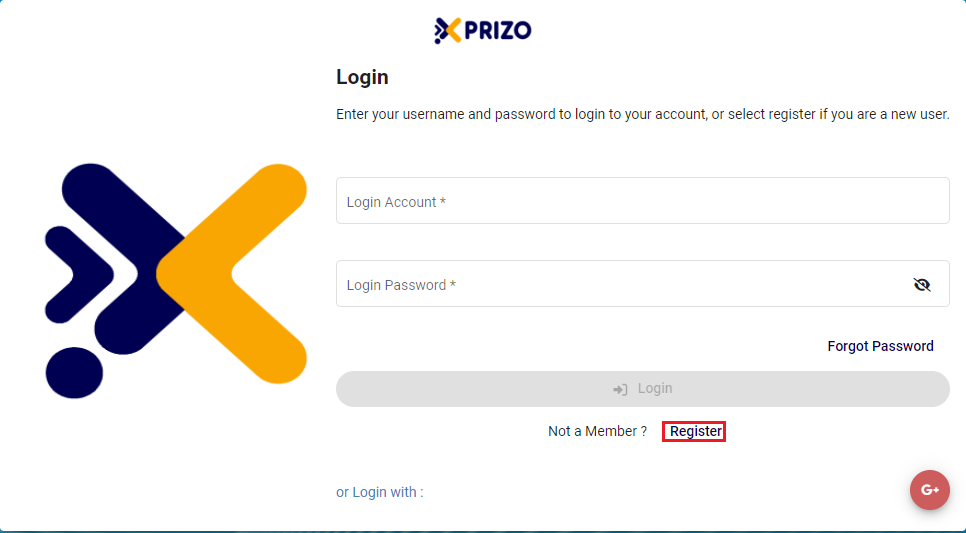
#### **1. Login/Registration**
- To initiate the creation of a new account, please [click here ](https://books.xprizo.com/books/user-manual/page/create-a-new-account)and follow the provided steps.
#### **2. Add Wallet**
To be able to perform any kind of transaction or manage funds the user needs to add a wallet in their profile to execute various transactional activities. By adding a wallet user can store their funds securely and carry out transactions directly from their account. To add a wallet follow the steps outlined below.
[**Add a New Wallet**](https://books.xprizo.com/books/user-manual/page/how-to-add-a-new-wallet)
#### **3. Add User Details**
To be able to send a merchant request to the back office, you will first need to complete user details for your profile. There you will need to complete your full name and address details. For a step-by-step guide, please click on the link below to learn how to add user details.
[**User Details**](https://books.xprizo.com/books/user-manual/page/user-details)
#### **4. Add KYC Details**
The next step is to complete KYC details and become KYC compliant. For this, you would have to upload your documents to verify your KYC. To initiate the KYC process, follow the provided steps below to complete the necessary procedures for KYC verification.
[**KYC Details**](https://books.xprizo.com/books/user-manual/page/complete-kyc)
#### **5. Send Merchant Request**
- Navigate to the Merchant tab to verify if all the necessary steps are completed. Then, click on the "Send Merchant Request" to let the back office know you want to become a merchant.

- Click on the "Confirm" button to send the request.
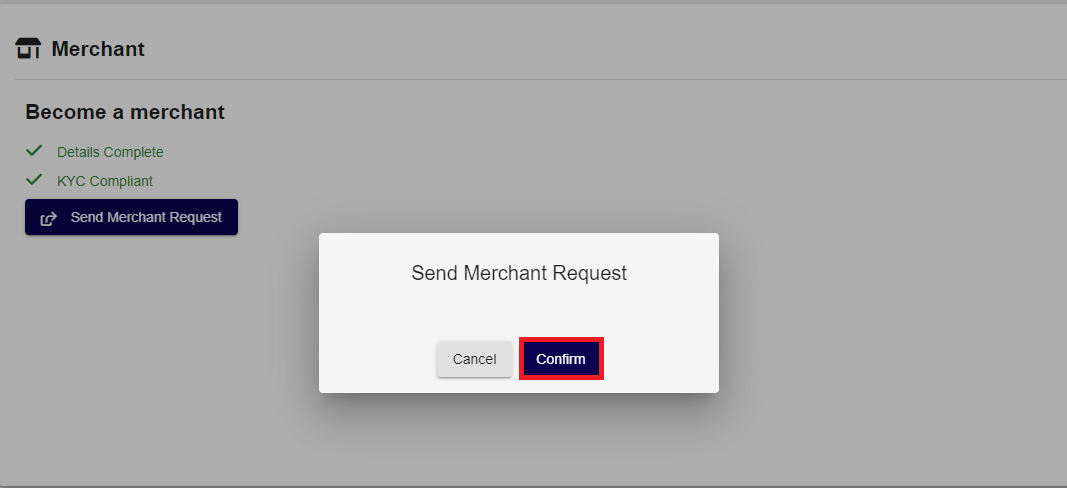
- After sending the request, the user must wait for approval from the back office. Upon approval, the user will become a Merchant.