# Wallet Management

The Wallet Management chapter offers comprehensive guidance on handling digital wallets within the platform. Users learn how to add, access, and manage their wallets efficiently. It covers topics like creating new wallets, accessing existing ones, and managing multiple currencies. Additionally, users discover how to fund their wallets using UPI, ensuring transactions. Furthermore, the chapter outlines procedures for granting wallet access to other users.

# How to Add a New Wallet?

### <span style="font-size: 13.999999999999998pt; font-family: Arial,sans-serif; color: #434343; background-color: transparent; font-weight: bold; font-style: normal; font-variant: normal; text-decoration: none; vertical-align: baseline; white-space: pre-wrap;">Add a New Wallet</span>

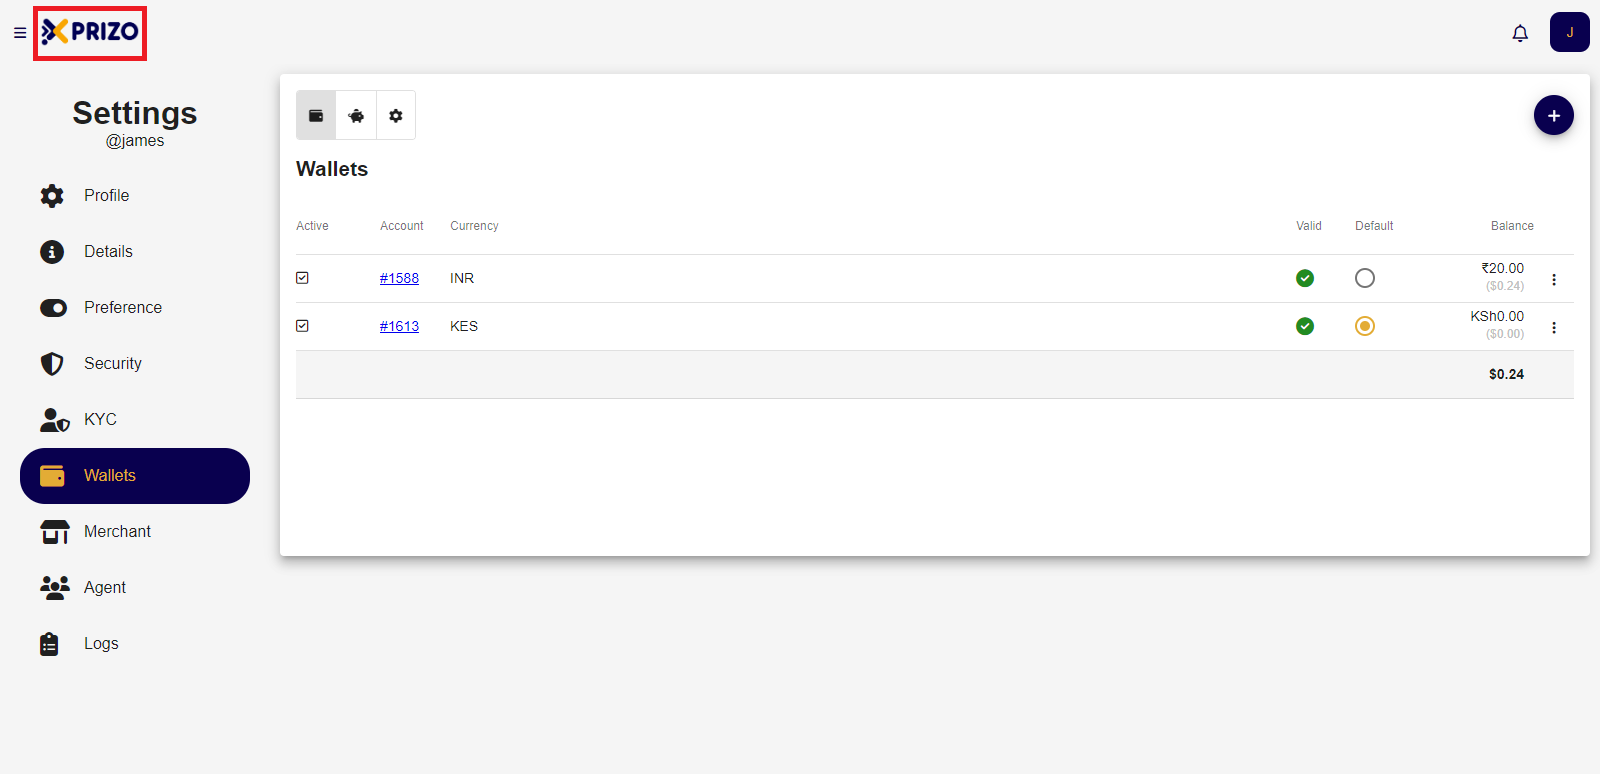
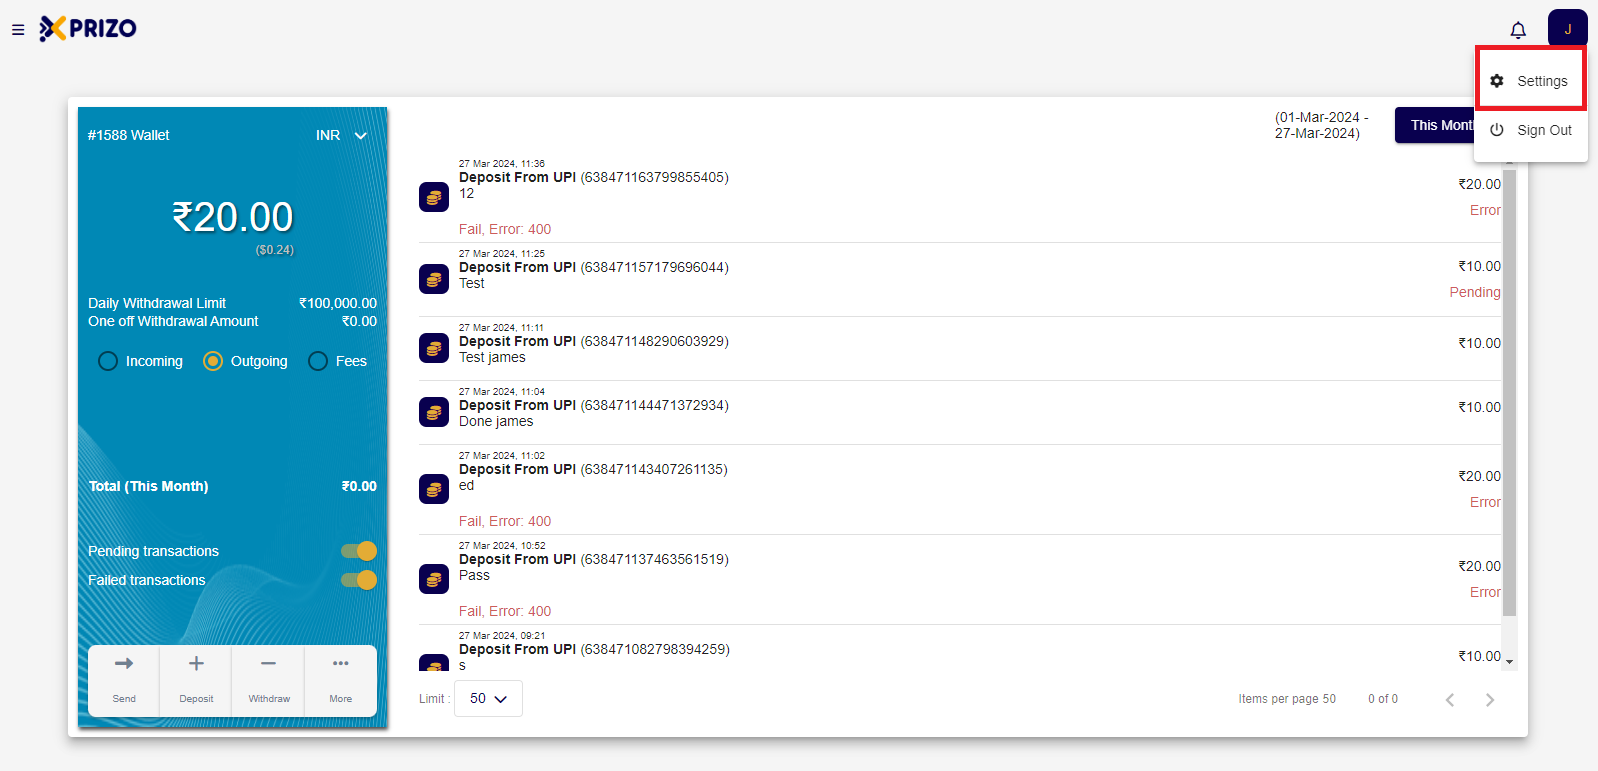
- Login to your account, and go to settings by clicking on the initial of your account in the top right corner.

![Screenshot 2024-01-29 235645.png](https://books.xprizo.com/uploads/images/gallery/2024-01/scaled-1680-/screenshot-2024-01-29-235645.png)

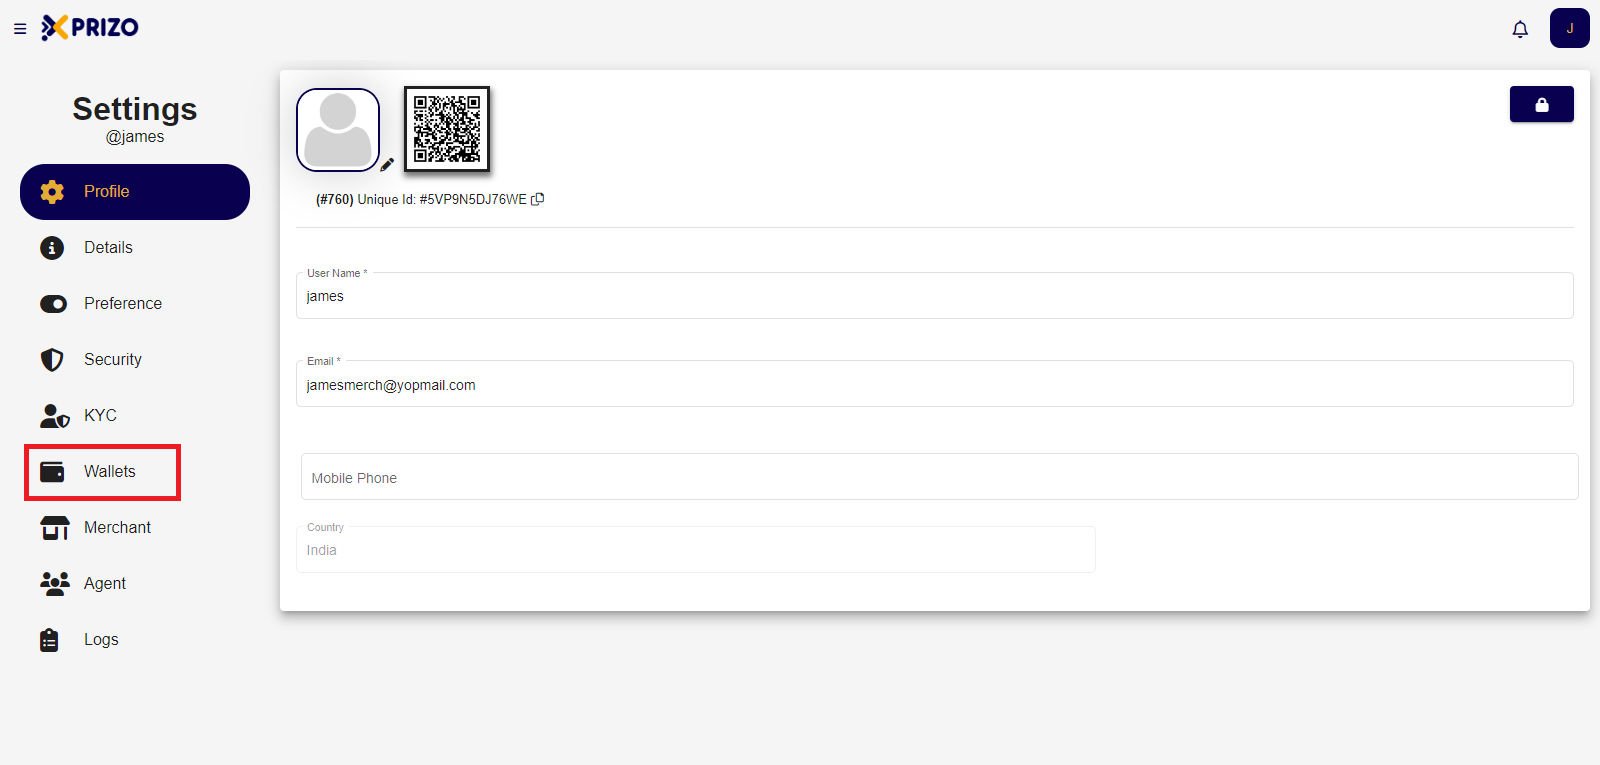
- Switch to the wallet tab to handle added wallets, savings, and adjust settings based on your preferences.
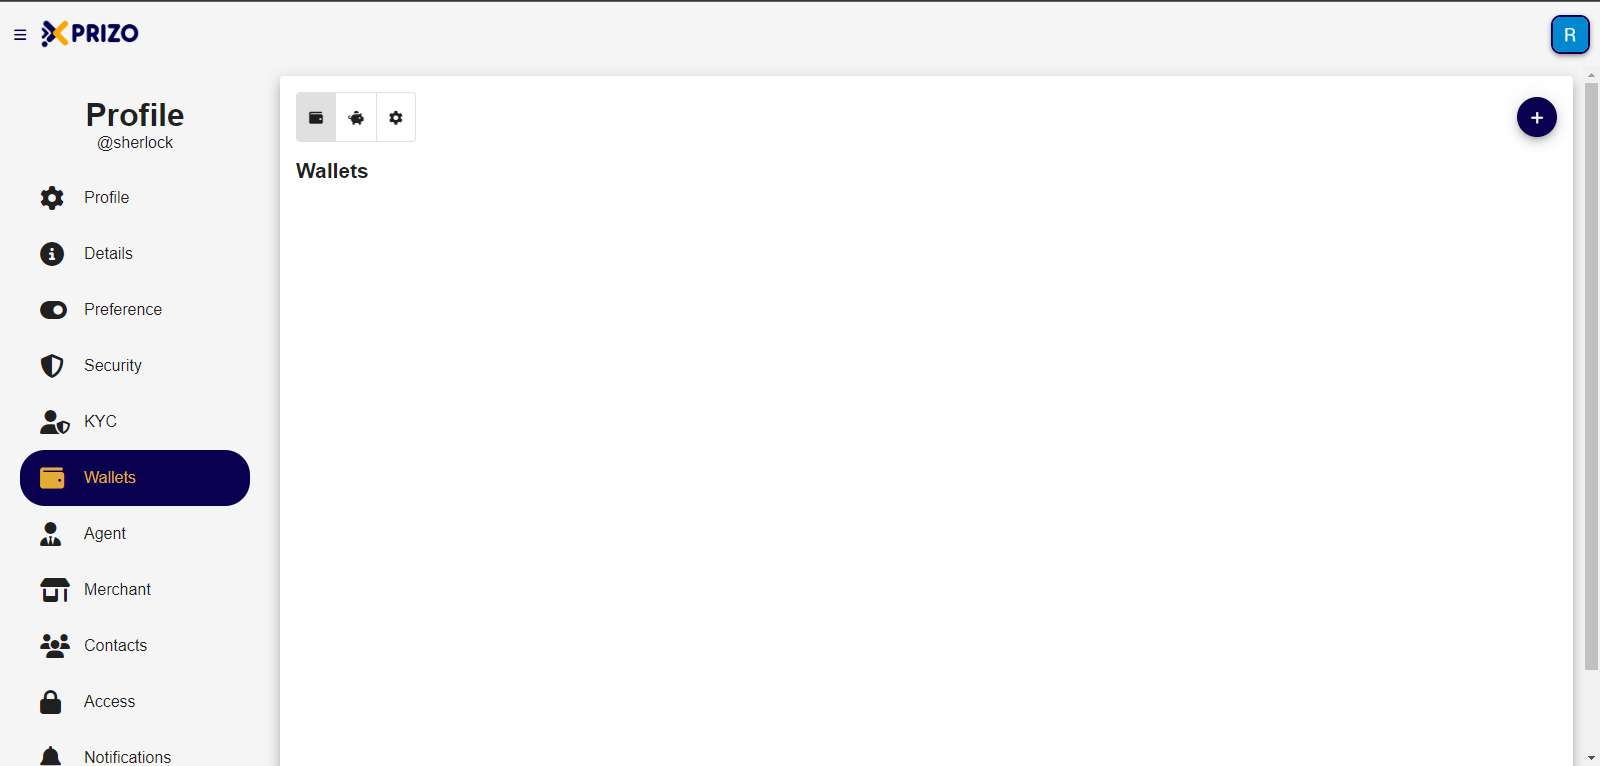
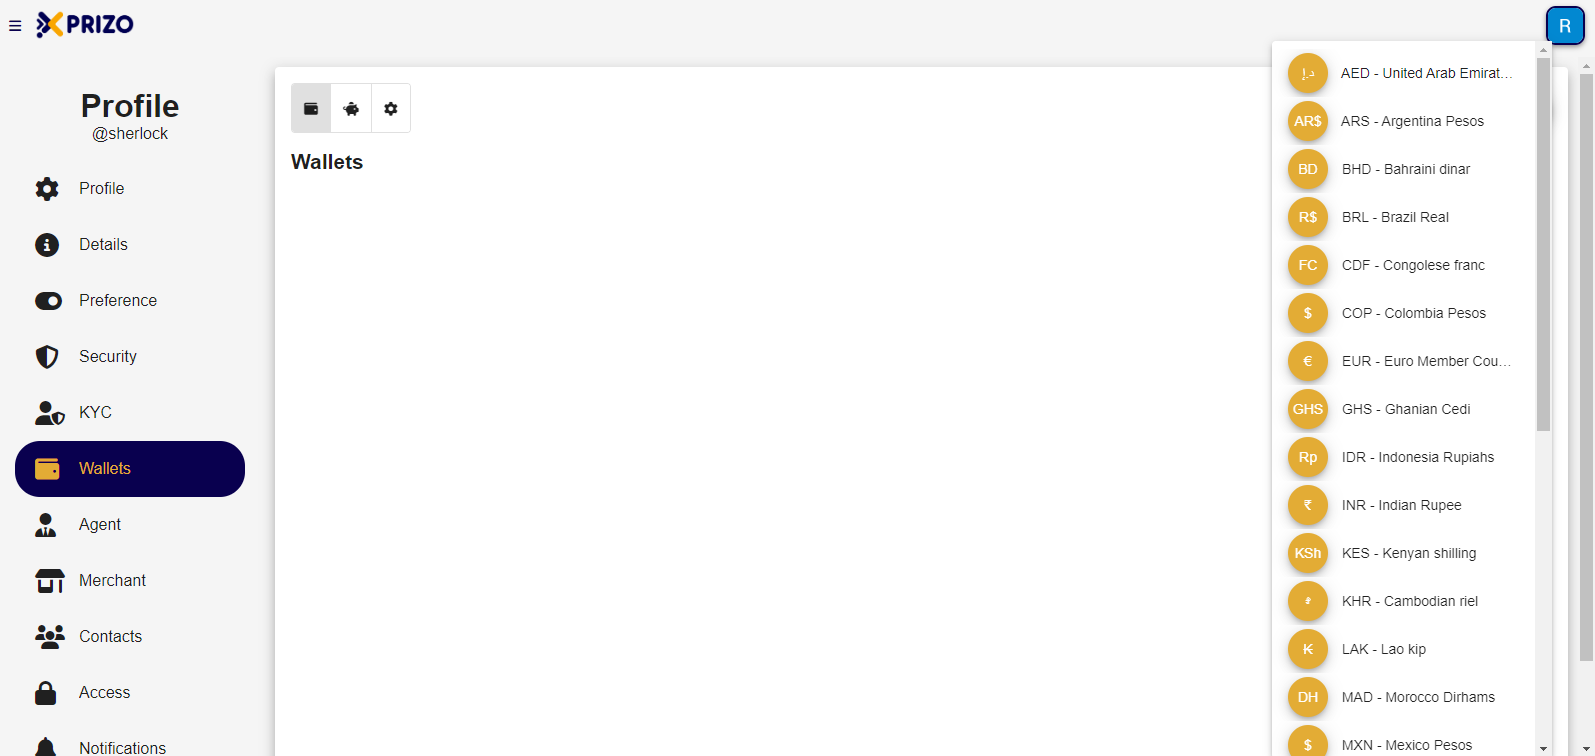
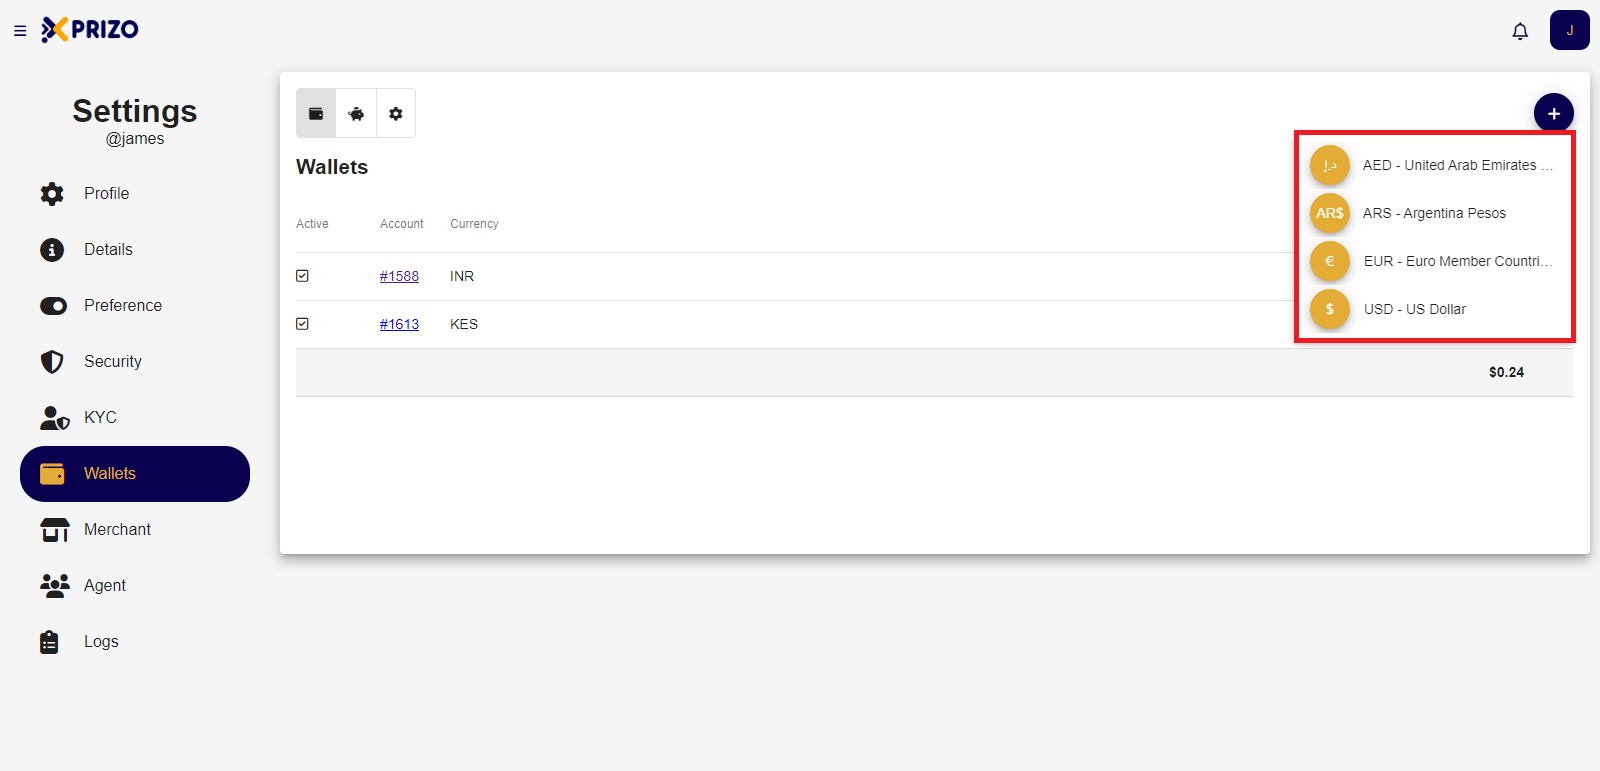
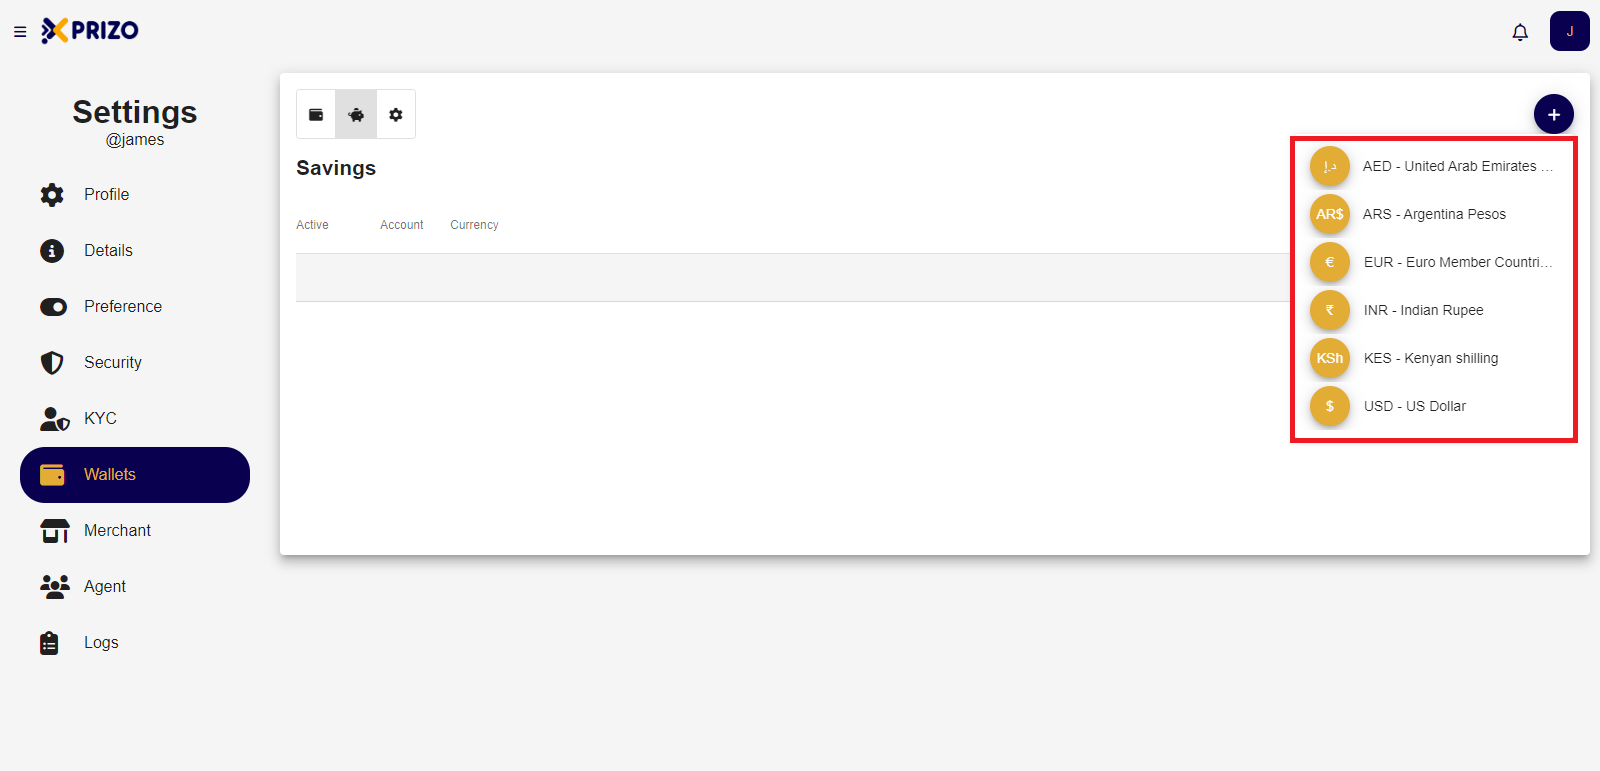
    
    <div class="w-full pt-2 md:pt-0 dark:border-white/20 md:border-transparent md:dark:border-transparent md:w-[calc(100%-.5rem)]"><form class="stretch mx-2 flex flex-row gap-3 last:mb-2 md:mx-4 md:last:mb-6 lg:mx-auto lg:max-w-2xl xl:max-w-3xl"></form>  
    </div>

<span style="font-size: 11pt; font-family: Arial, sans-serif; background-color: transparent; font-weight: 400; font-style: normal; font-variant: normal; text-wrap: wrap;">![Screenshot 2024-01-10 160153.png](https://books.xprizo.com/uploads/images/gallery/2024-01/scaled-1680-/screenshot-2024-01-10-160153.png)</span>

- <span style="font-size: 11pt; font-family: Arial, sans-serif; background-color: transparent; font-weight: 400; font-style: normal; font-variant: normal; text-wrap: wrap;">To add a new wallet click on the ![Add.png](https://books.xprizo.com/uploads/images/gallery/2024-01/scaled-1680-/add.png) button which will open a dropdown containing various currencies to select from and add them to the wallet.</span>

<span style="font-size: 11pt; font-family: Arial, sans-serif; background-color: transparent; font-weight: 400; font-style: normal; font-variant: normal; text-wrap: wrap;">![Screenshot 2024-01-10 172710.png](https://books.xprizo.com/uploads/images/gallery/2024-01/scaled-1680-/screenshot-2024-01-10-172710.png)</span>

- <span style="background-color: transparent; font-family: Arial, sans-serif; font-size: 11pt; font-style: normal; font-variant-ligatures: normal; font-variant-caps: normal; font-weight: 400; text-wrap: wrap; color: #444444;">
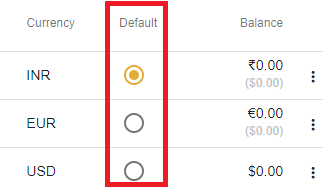
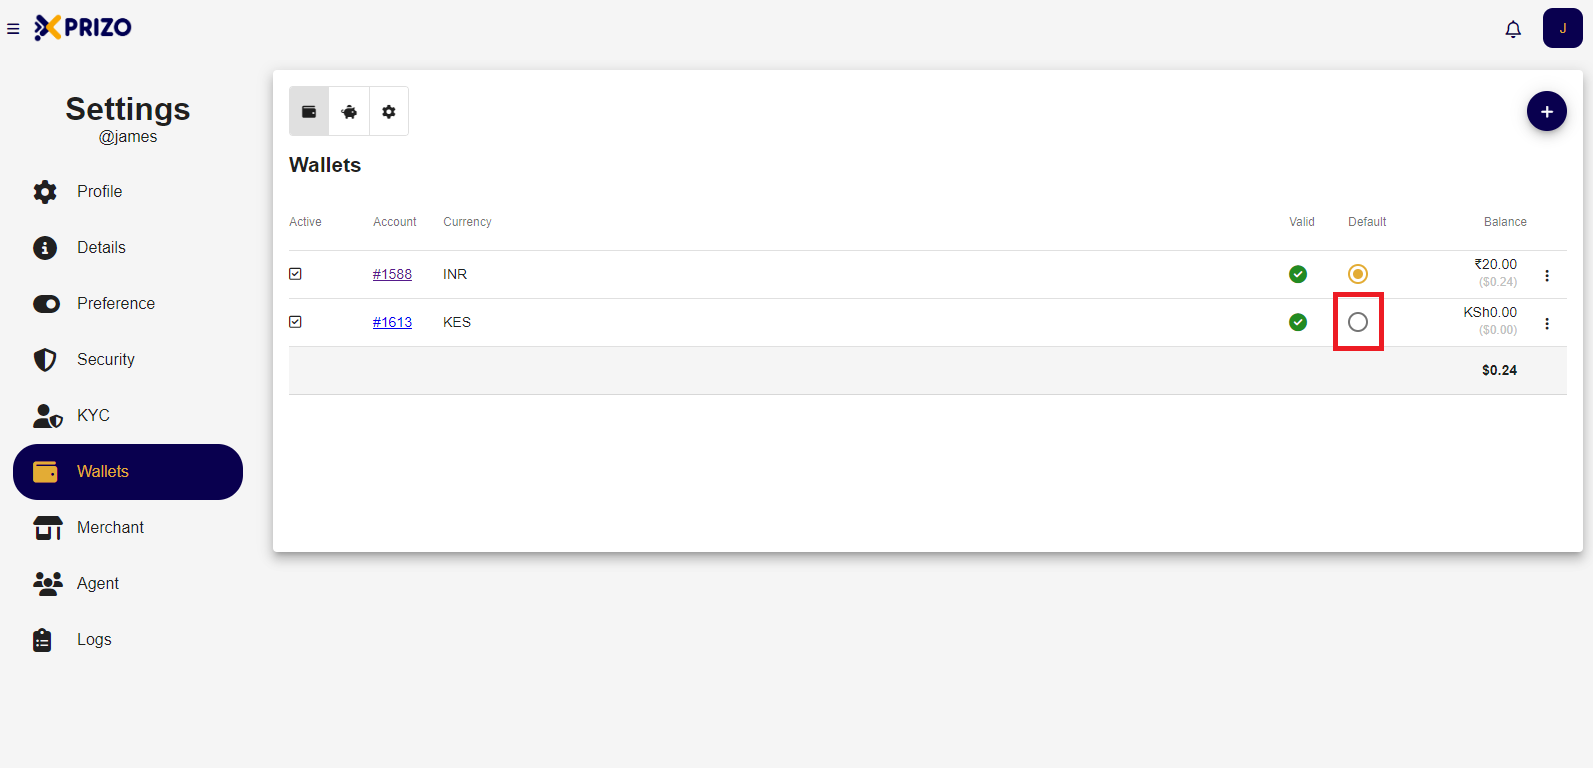
Once the wallet has been added, click on the radio button in front of the currency to set it as default for the user.</span>

<span style="background-color: transparent; font-family: Arial, sans-serif; font-size: 11pt; font-style: normal; font-variant-ligatures: normal; font-variant-caps: normal; font-weight: 400; text-wrap: wrap; color: #444444;">![default.png](https://books.xprizo.com/uploads/images/gallery/2024-01/scaled-1680-/default.png)</span>

- <span style="background-color: transparent; color: #444444; font-family: Arial, sans-serif; font-size: 11pt; font-style: normal; font-variant-ligatures: normal; font-variant-caps: normal; font-weight: 400; text-wrap: wrap;">To remove any wallet click on the ellipsis button to open the dropdown for removing the desired wallet.</span>

<span style="background-color: transparent; color: #444444; font-family: Arial, sans-serif; font-size: 11pt; font-style: normal; font-variant-ligatures: normal; font-variant-caps: normal; font-weight: 400; text-wrap: wrap;">![delete.png](https://books.xprizo.com/uploads/images/gallery/2024-01/scaled-1680-/delete.png)</span>

# How to Access Wallets?

- Sign in to your account using your credentials to access your wallets.

![Screenshot 2024-03-27 120059.png](https://books.xprizo.com/uploads/images/gallery/2024-03/scaled-1680-/screenshot-2024-03-27-120059.png)

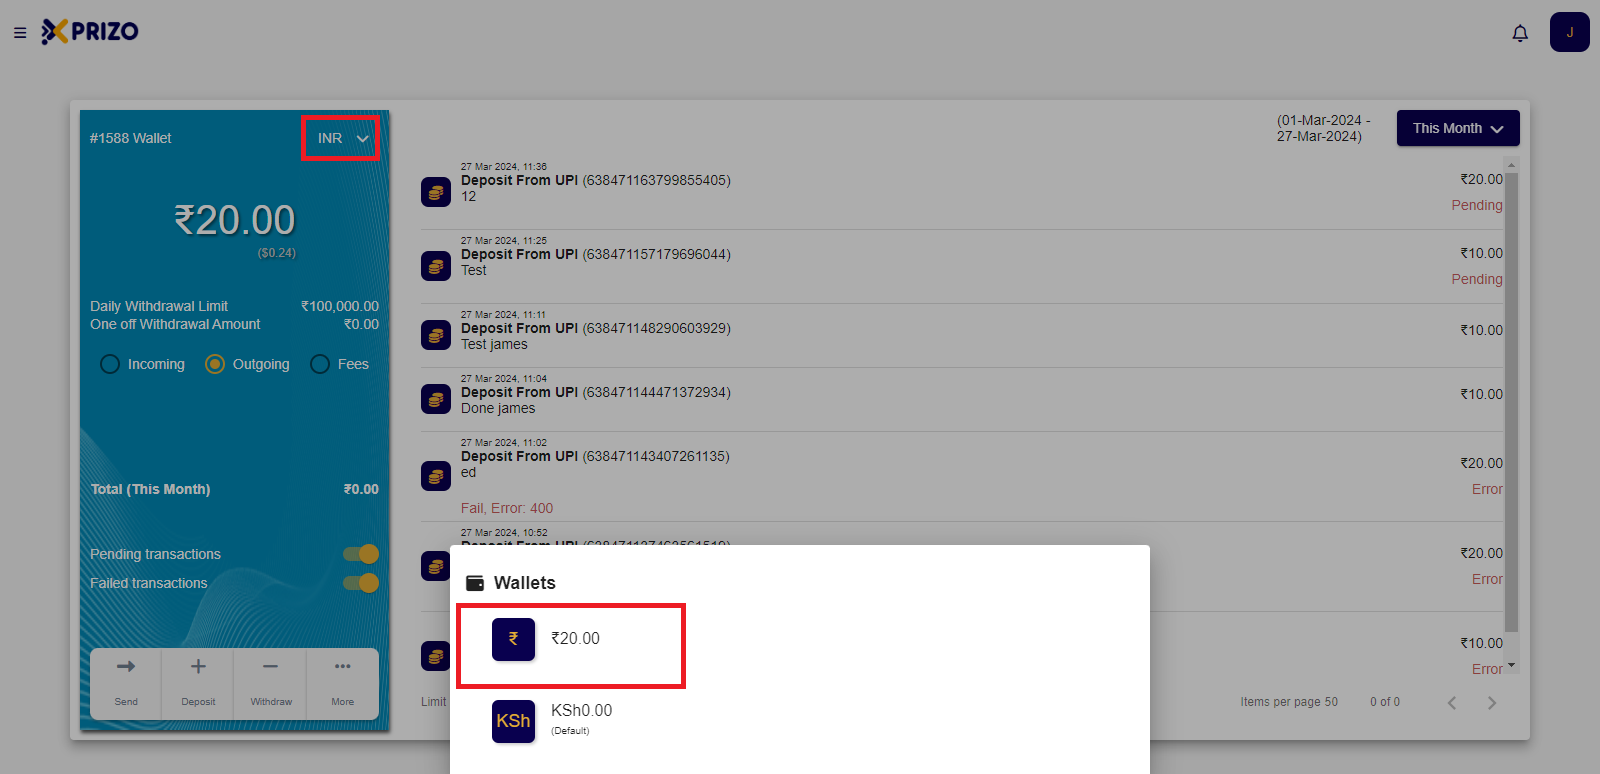
- Select the Xprizo logo located at the top left corner to navigate back to the dashboard and view your added wallets.

![Screenshot 2024-03-27 140129.png](https://books.xprizo.com/uploads/images/gallery/2024-03/scaled-1680-/screenshot-2024-03-27-140129.png)

- To switch between wallets, click on the currency dropdown menu and select the desired currency.

![Screenshot 2024-03-27 120149.png](https://books.xprizo.com/uploads/images/gallery/2024-03/scaled-1680-/screenshot-2024-03-27-120149.png)

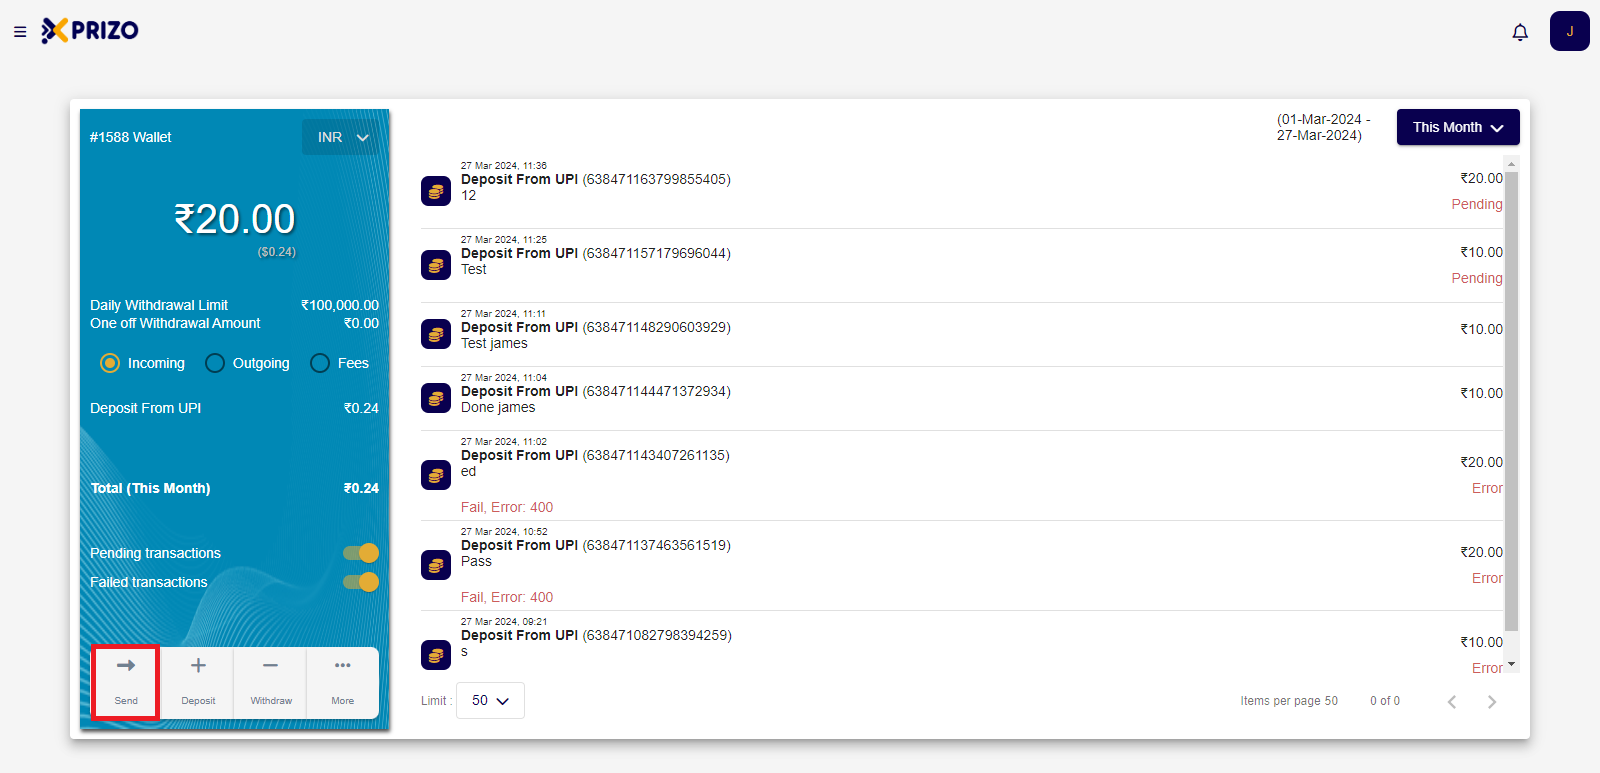
- Click on the "Send" button to transfer money to your added contacts.

![Screenshot 2024-03-27 120059.png](https://books.xprizo.com/uploads/images/gallery/2024-03/scaled-1680-/OKQscreenshot-2024-03-27-120059.png)

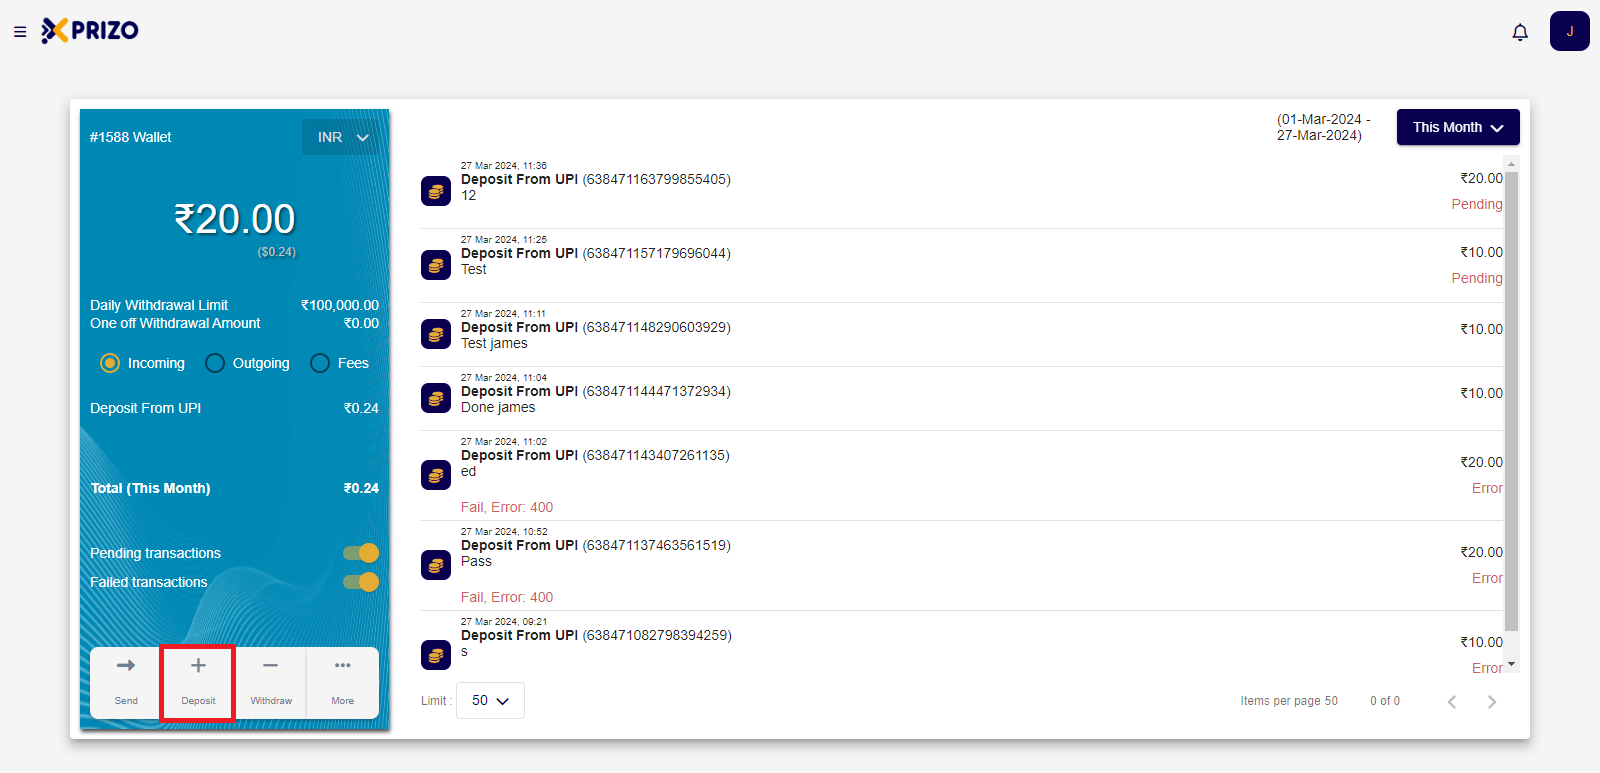
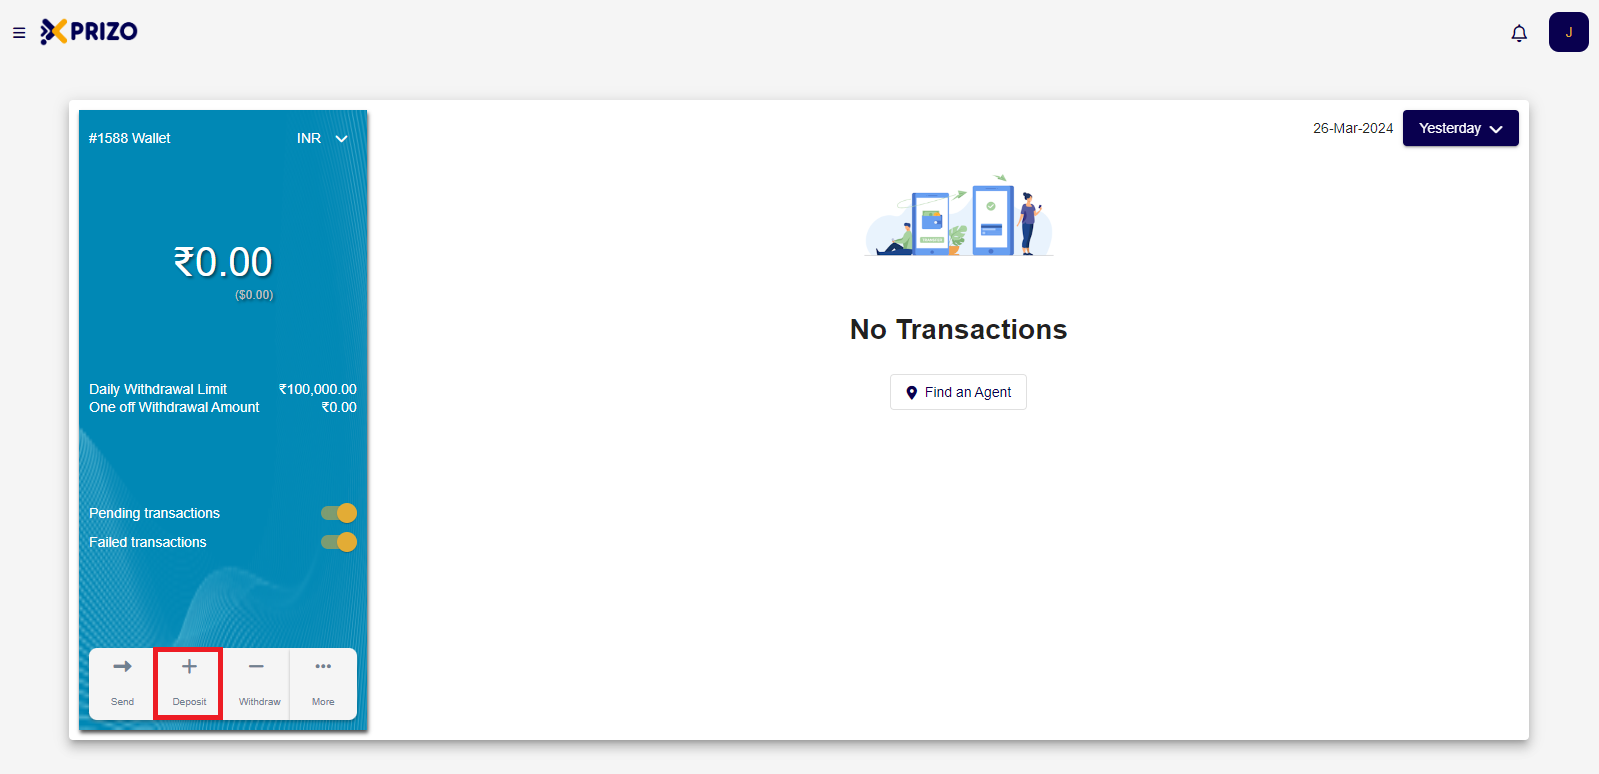
- Click on "Deposit" to add funds to your wallet via Agent, Bank Account, or UPI.

![Screenshot 2024-03-27 120059 - Copy.png](https://books.xprizo.com/uploads/images/gallery/2024-03/scaled-1680-/screenshot-2024-03-27-120059-copy.png)

- Click on "Withdraw" to initiate a withdrawal from your wallet via Agent or Bank Account.

![Screenshot 2024-03-27 120059 - Copy (2).png](https://books.xprizo.com/uploads/images/gallery/2024-03/scaled-1680-/screenshot-2024-03-27-120059-copy-2.png)

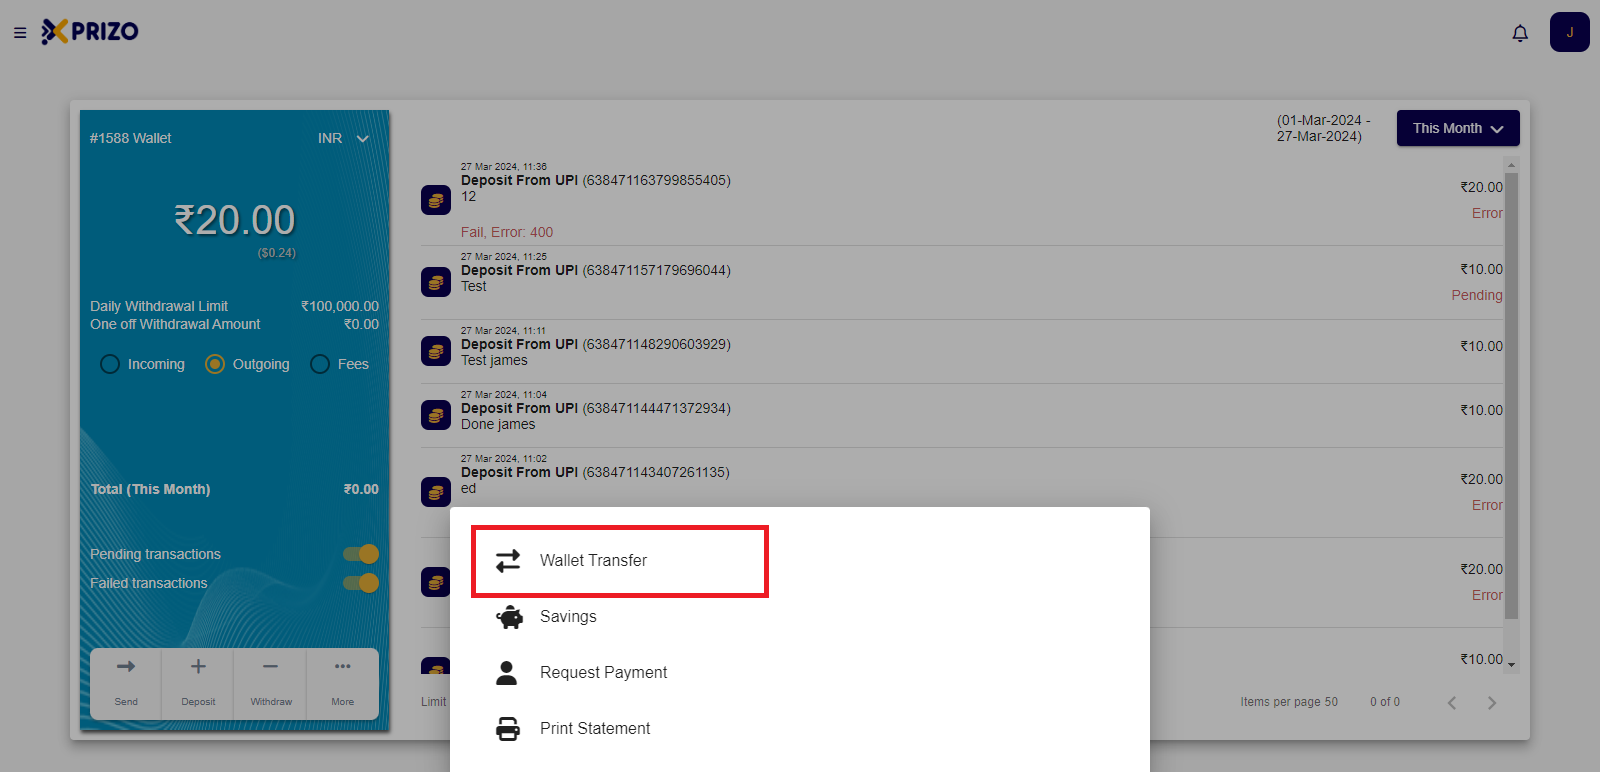
- To perform a wallet transfer, click on the "More" option and select "Wallet Transfer" to exchange currencies between wallets.

![Screenshot 2024-03-27 140741.png](https://books.xprizo.com/uploads/images/gallery/2024-03/scaled-1680-/screenshot-2024-03-27-140741.png)

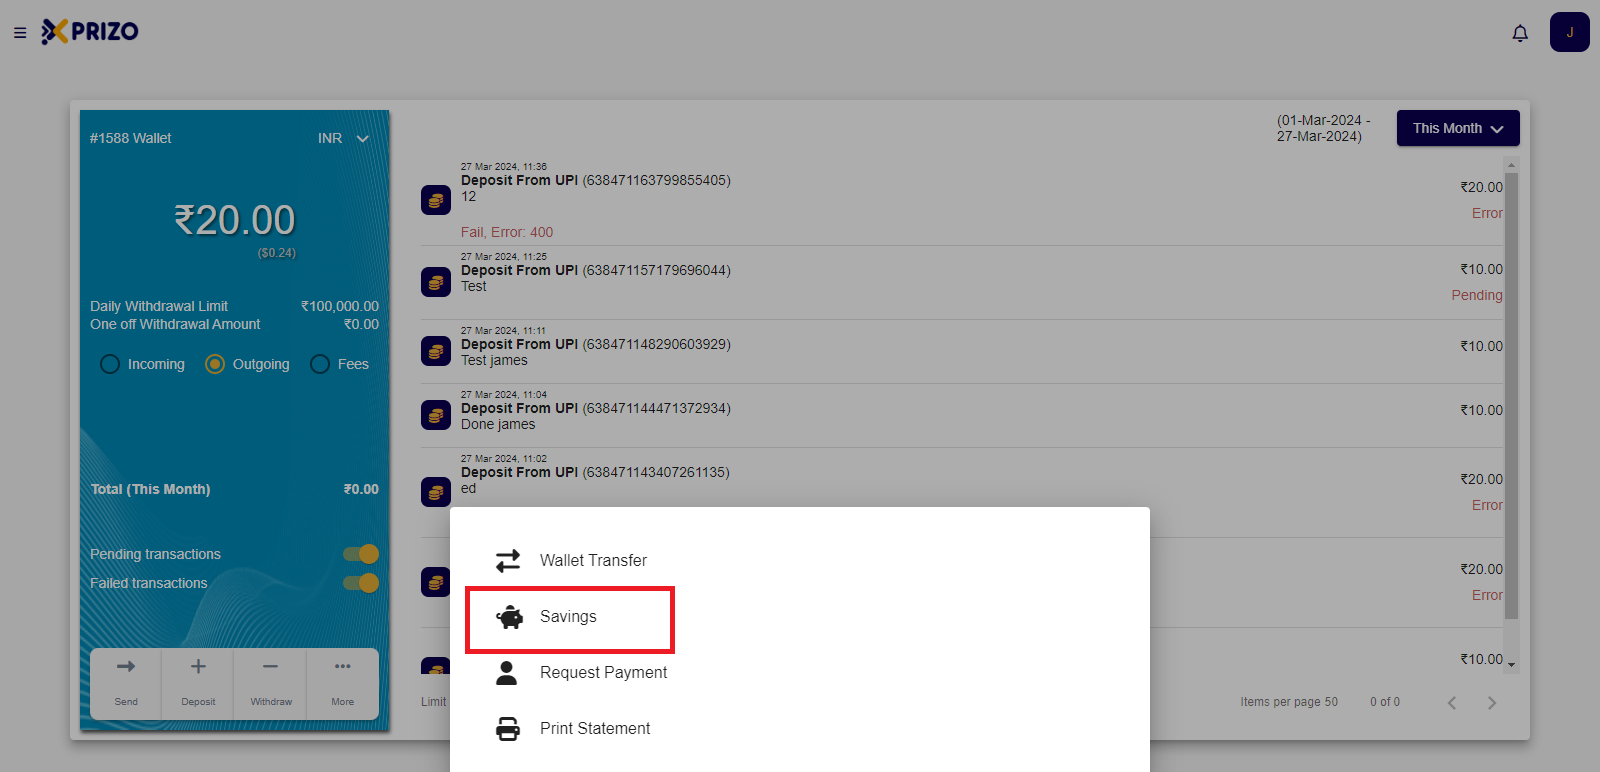
- To manage your savings, click on "More" and select "Savings" to view and manage your savings balance.

![Screenshot 2024-03-27 140741 - Copy.png](https://books.xprizo.com/uploads/images/gallery/2024-03/scaled-1680-/screenshot-2024-03-27-140741-copy.png)

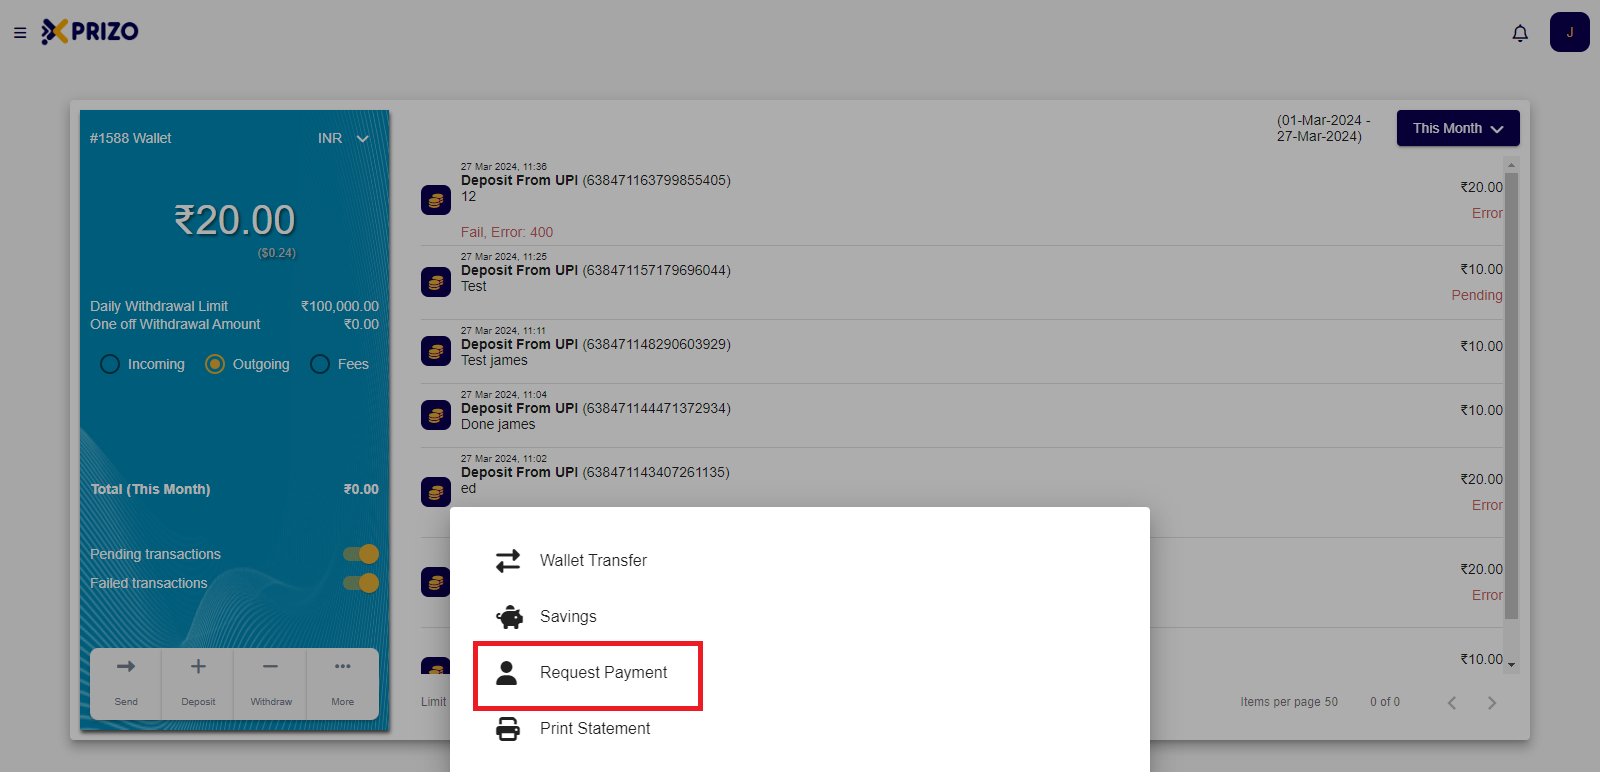
- To request a payment from someone, click on "More" and select "Request Payment" to initiate the payment request.

![Screenshot 2024-03-27 140741 - Copy (2).png](https://books.xprizo.com/uploads/images/gallery/2024-03/scaled-1680-/screenshot-2024-03-27-140741-copy-2.png)

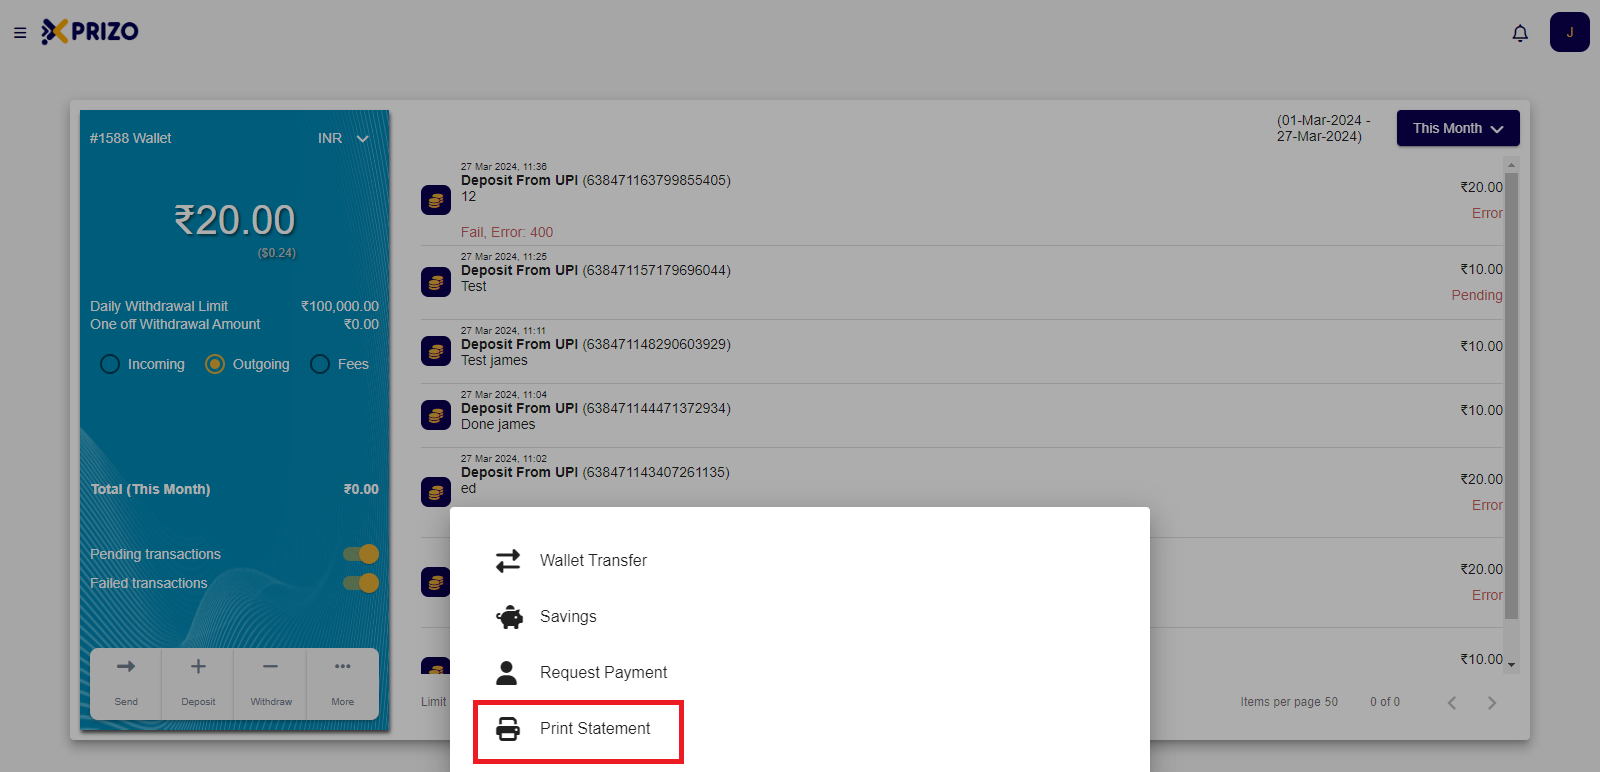
- To print a statement click on More and select Print Statement to print a statement.

![Screenshot 2024-03-27 140741 - Copy (3).png](https://books.xprizo.com/uploads/images/gallery/2024-03/scaled-1680-/screenshot-2024-03-27-140741-copy-3.png)

# How to Manage Wallets?

- Sign in with your credentials and navigate to your account settings by clicking on your account name initial located in the top right corner, then select "Settings".

![Screenshot 2024-03-27 151832.png](https://books.xprizo.com/uploads/images/gallery/2024-03/scaled-1680-/screenshot-2024-03-27-151832.png)

- Navigate to the "Wallets" section using the left navigation menu to access and manage your wallets.

![Screenshot 2024-03-27 152035.png](https://books.xprizo.com/uploads/images/gallery/2024-03/scaled-1680-/screenshot-2024-03-27-152035.png)

- To add a new wallet, click on the "Add" icon and choose the currency you want to add a wallet for. Then, select the desired currency to create the wallet.

![Screenshot 2024-03-27 152238.png](https://books.xprizo.com/uploads/images/gallery/2024-03/scaled-1680-/screenshot-2024-03-27-152238.png)

- To set a wallet as default, simply click on the radio button next to the desired wallet to mark it as the default option.

![Screenshot 2024-03-27 154022.png](https://books.xprizo.com/uploads/images/gallery/2024-03/scaled-1680-/screenshot-2024-03-27-154022.png)

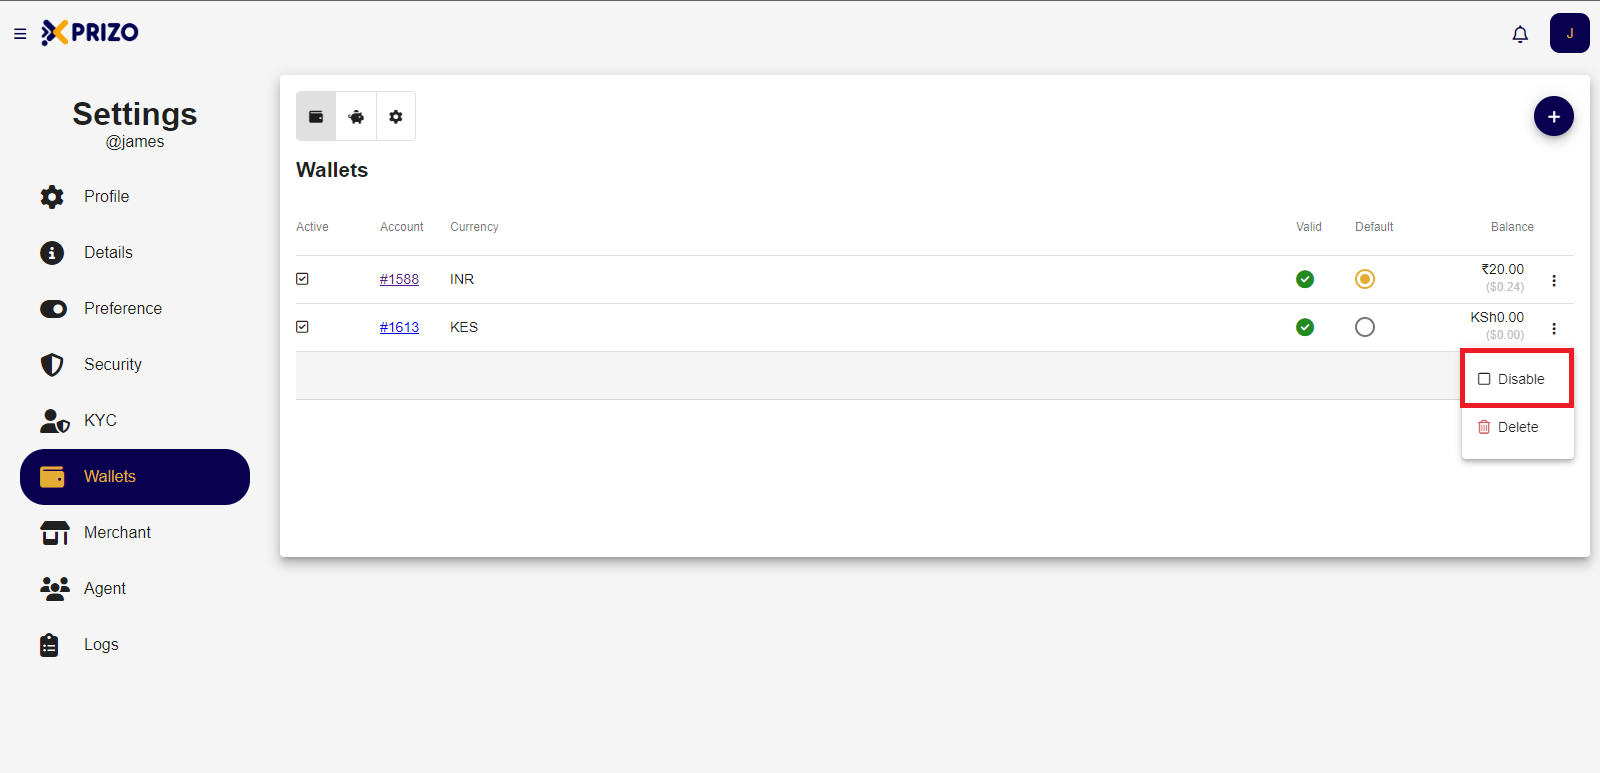
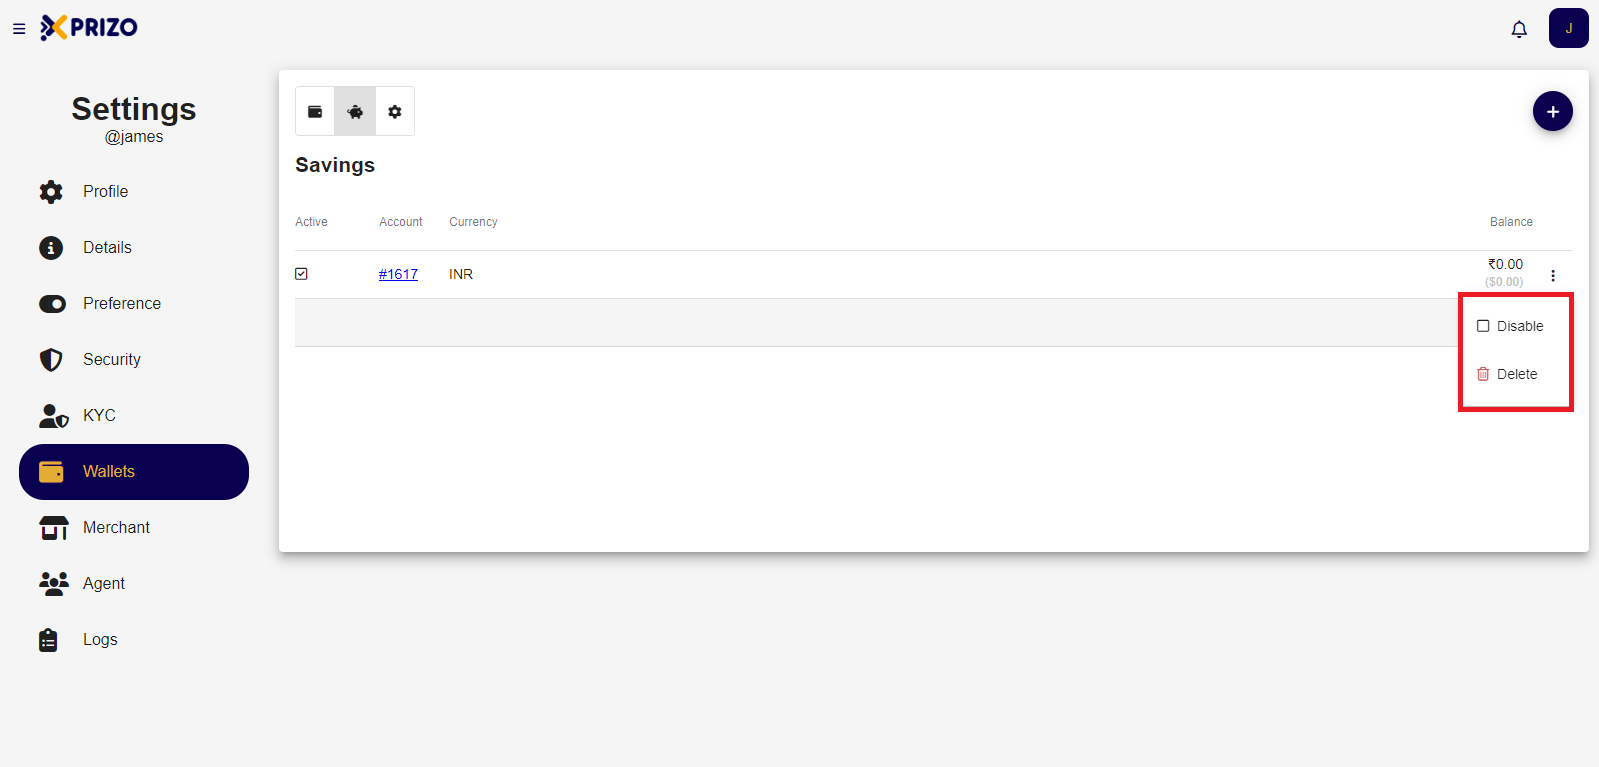
- To disable a wallet, click on the ellipsis icon next to the wallet you want to disable, then select the "Disable" option from the menu.
    
    <div class="w-full text-token-text-primary" data-testid="conversation-turn-572"><div class="px-4 py-2 justify-center text-base md:gap-6 m-auto"><div class="flex flex-1 text-base mx-auto gap-3 md:px-5 lg:px-1 xl:px-5 md:max-w-3xl lg:max-w-[40rem] xl:max-w-[48rem] group">  
    </div></div></div>

![Screenshot 2024-03-27 152053.png](https://books.xprizo.com/uploads/images/gallery/2024-03/scaled-1680-/screenshot-2024-03-27-152053.png)

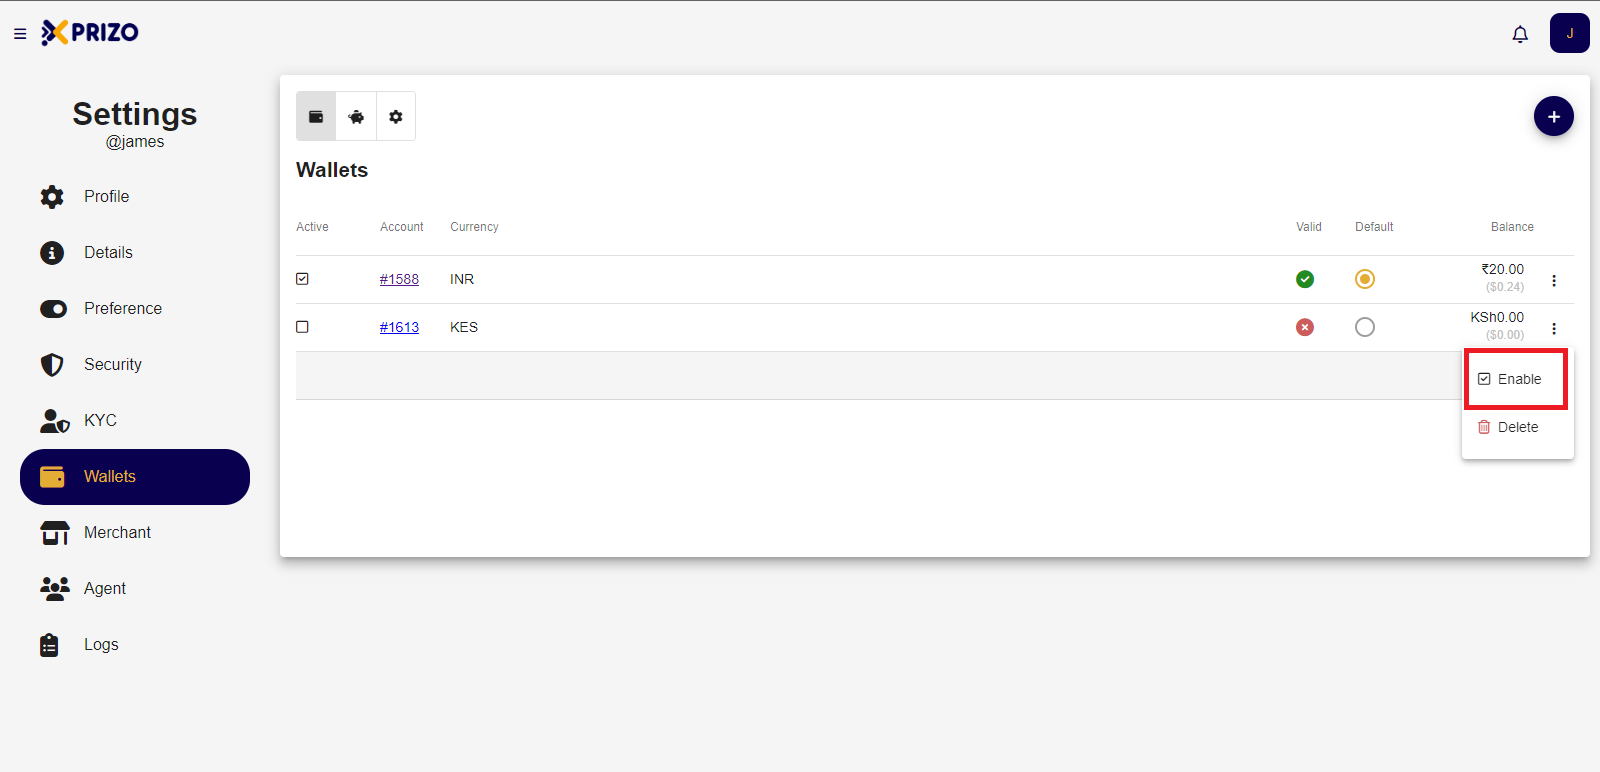
- To enable a wallet, simply click on the ellipsis icon next to the wallet you wish to enable, and then select the "Enable" option from the menu.

![Screenshot 2024-03-27 154303.png](https://books.xprizo.com/uploads/images/gallery/2024-03/scaled-1680-/screenshot-2024-03-27-154303.png)

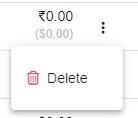
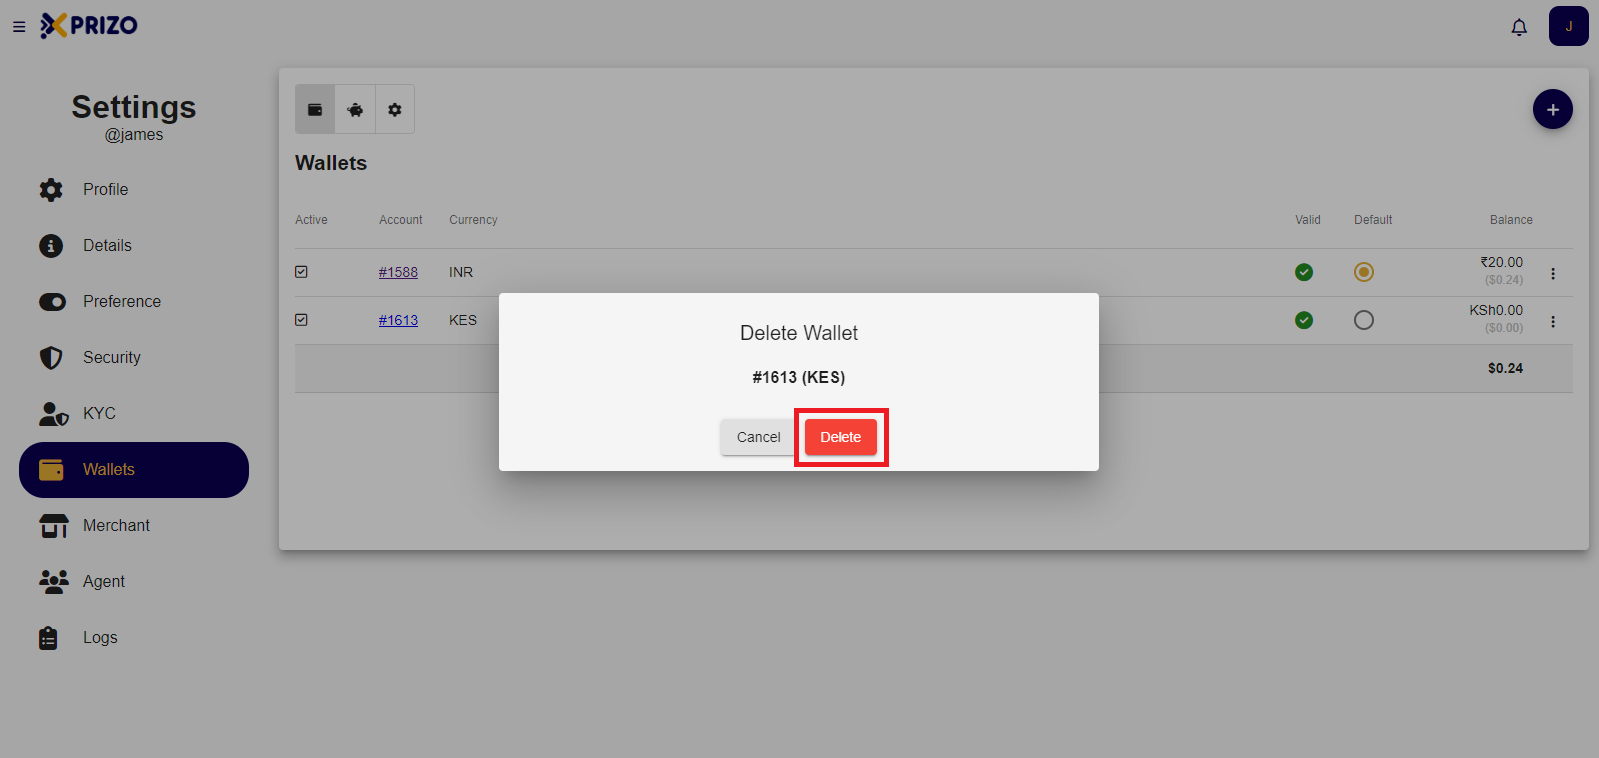
- To delete a wallet, click on the ellipsis icon next to the wallet you want to delete. Then, select the "Delete" option from the menu. Confirm your selection by clicking on "Delete", or click "Cancel" to abort the deletion process.

![Screenshot 2024-03-27 152102.png](https://books.xprizo.com/uploads/images/gallery/2024-03/scaled-1680-/screenshot-2024-03-27-152102.png)

- Click on the piggybank icon to switch to the savings wallet.
    
    <div class="w-full text-token-text-primary" data-testid="conversation-turn-578"><div class="px-4 py-2 justify-center text-base md:gap-6 m-auto"><div class="flex flex-1 text-base mx-auto gap-3 md:px-5 lg:px-1 xl:px-5 md:max-w-3xl lg:max-w-[40rem] xl:max-w-[48rem] group">  
    </div></div></div>

![Screenshot 2024-03-27 152140.png](https://books.xprizo.com/uploads/images/gallery/2024-03/scaled-1680-/screenshot-2024-03-27-152140.png)

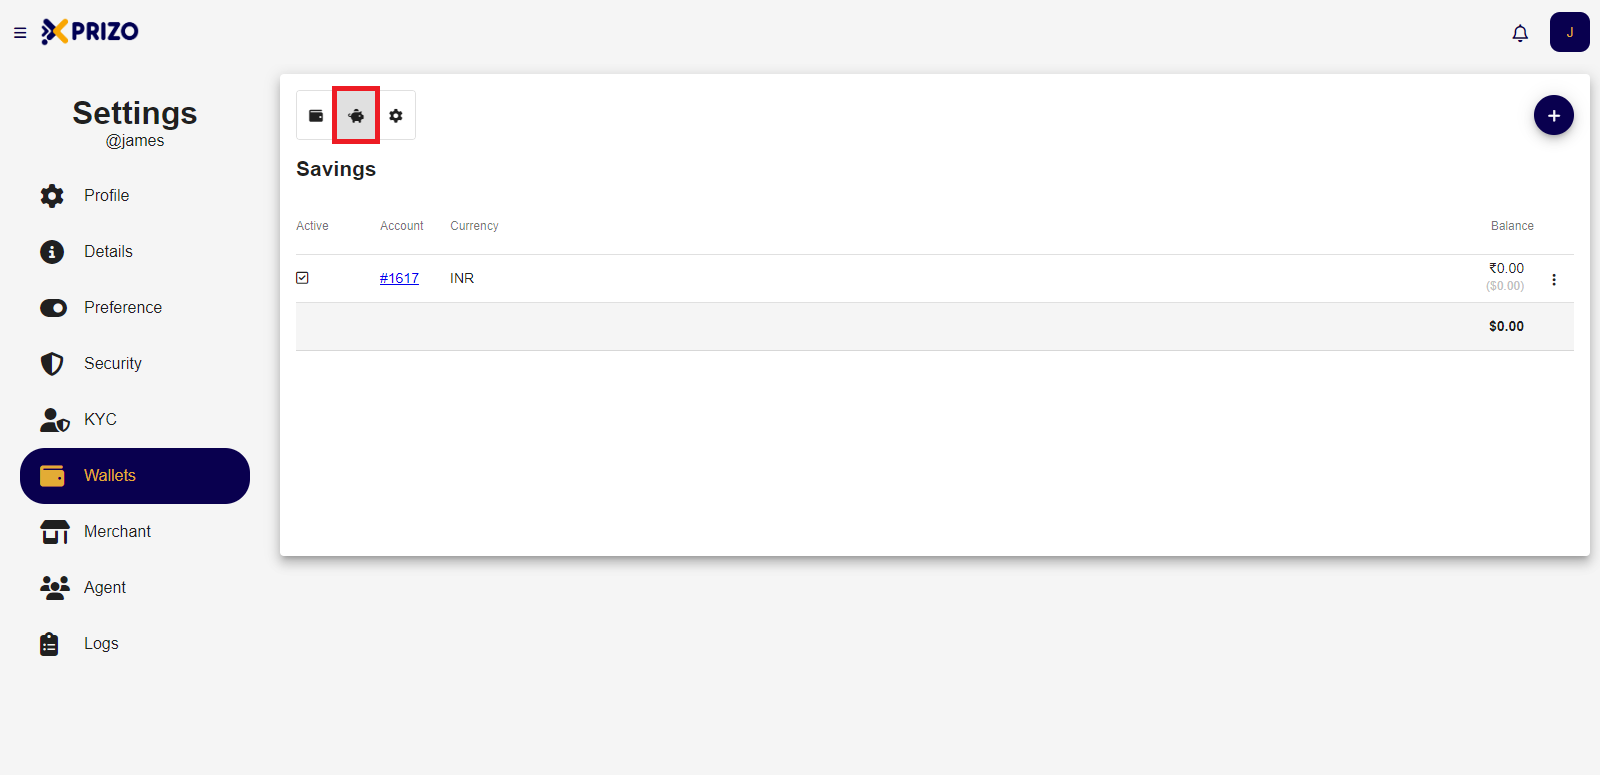
- Click on the "Add Wallet" button in your savings to select the currency for which you wish to add the wallet, then choose that currency to create a wallet for it.

![Screenshot 2024-03-27 152123.png](https://books.xprizo.com/uploads/images/gallery/2024-03/scaled-1680-/screenshot-2024-03-27-152123.png)

- Click on the ellipsis icon to enable or disable the wallet, or to delete the selected wallet.

![Screenshot 2024-03-27 152148.png](https://books.xprizo.com/uploads/images/gallery/2024-03/scaled-1680-/screenshot-2024-03-27-152148.png)

- Click on the settings icon to navigate to wallet settings where you can view details such as Total Withdrawals and Agent Withdrawal fees for valid currencies.

![Screenshot 2024-03-27 152156.png](https://books.xprizo.com/uploads/images/gallery/2024-03/scaled-1680-/screenshot-2024-03-27-152156.png)

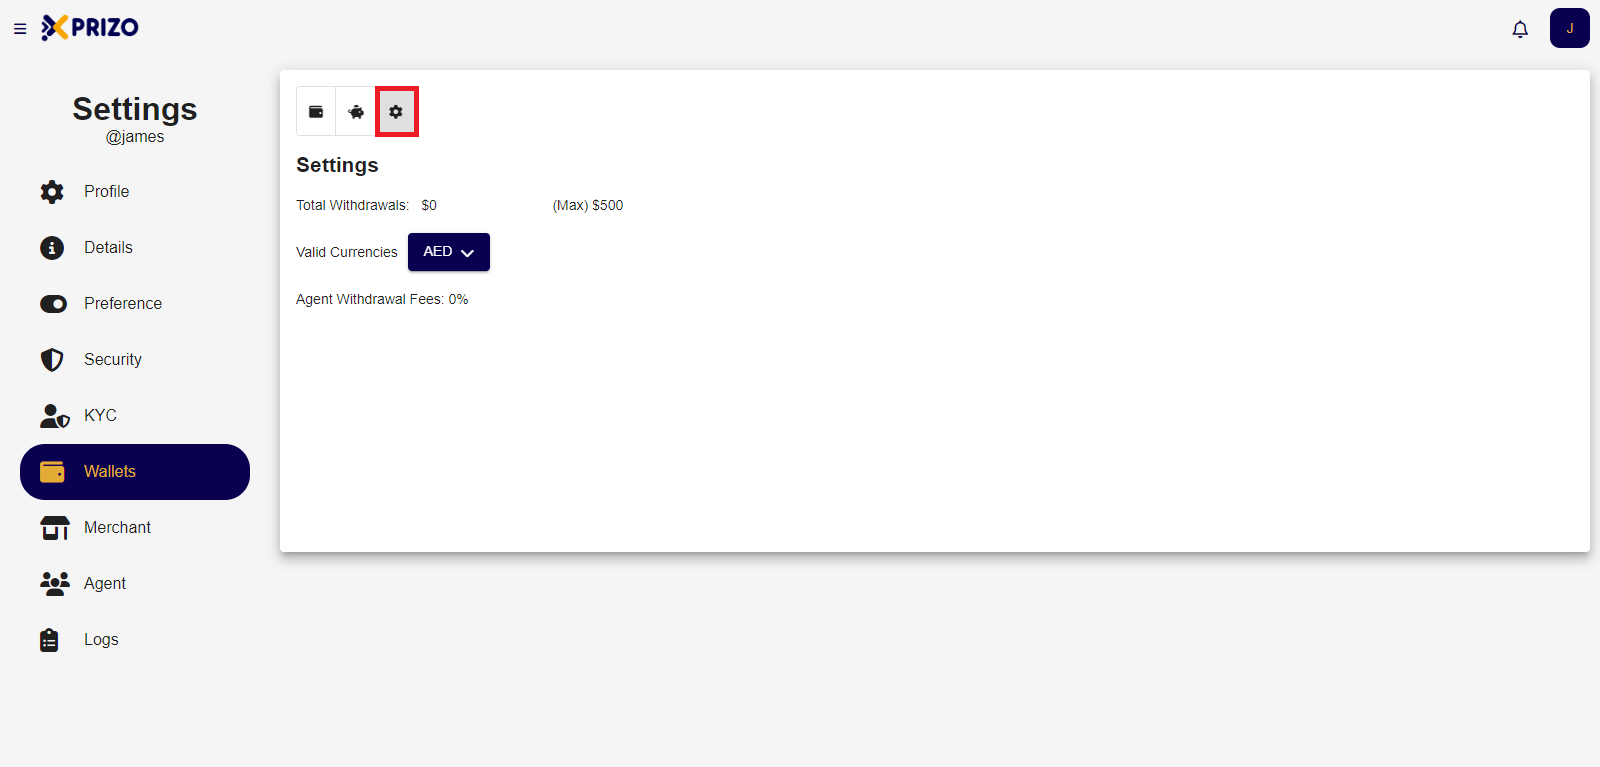
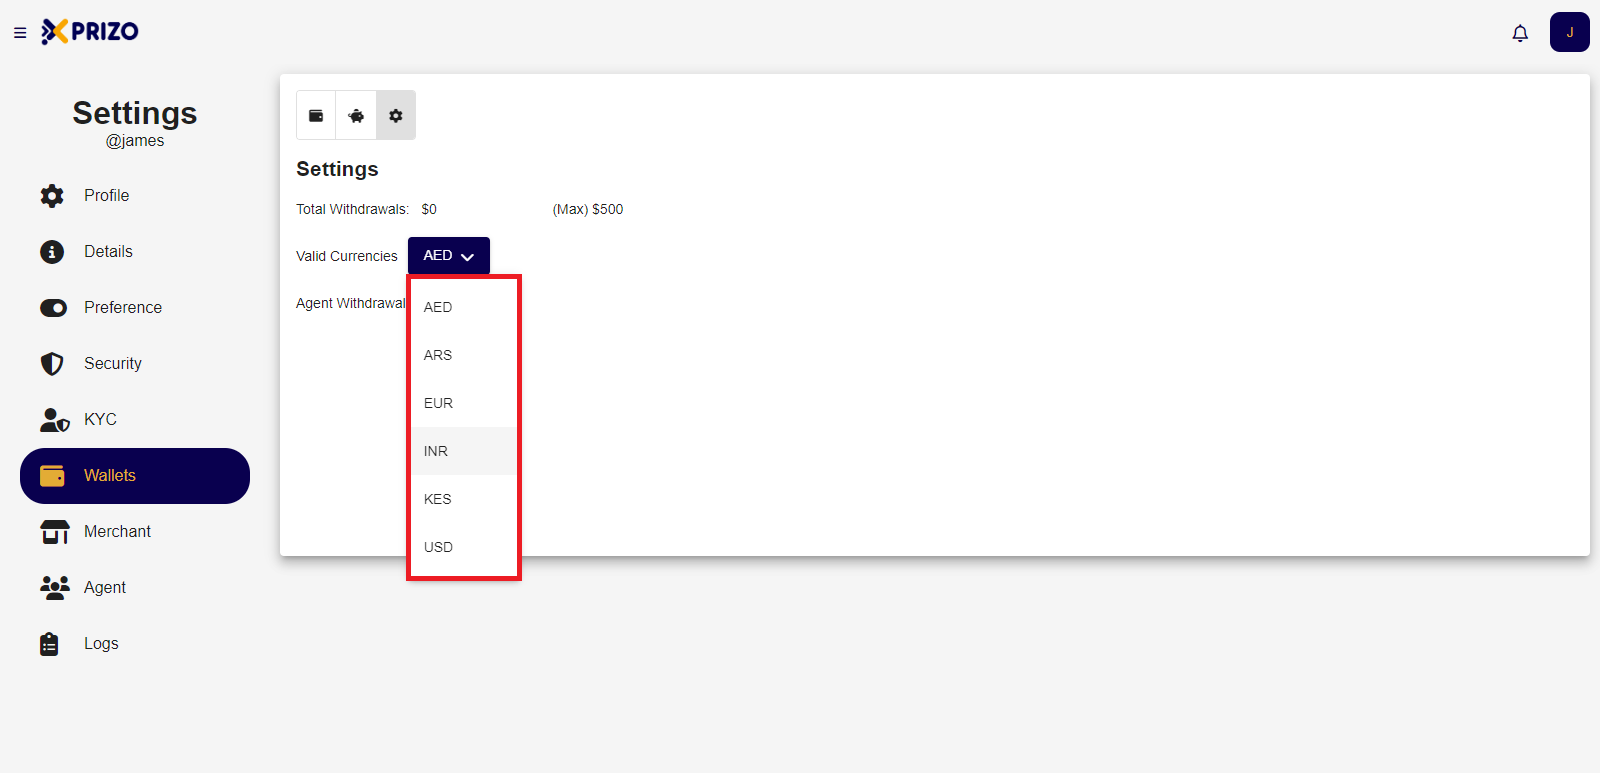
- Select the desired currency from the valid currencies dropdown to view the data specific to that currency.

![Screenshot 2024-03-27 152205.png](https://books.xprizo.com/uploads/images/gallery/2024-03/scaled-1680-/screenshot-2024-03-27-152205.png)

# How To Top Up Wallet with UPI?

- Sign in to your account using your credentials, then click on the "Deposit" section to add funds to your wallet.

![Screenshot 2024-03-27 104943.png](https://books.xprizo.com/uploads/images/gallery/2024-03/scaled-1680-/screenshot-2024-03-27-104943.png)

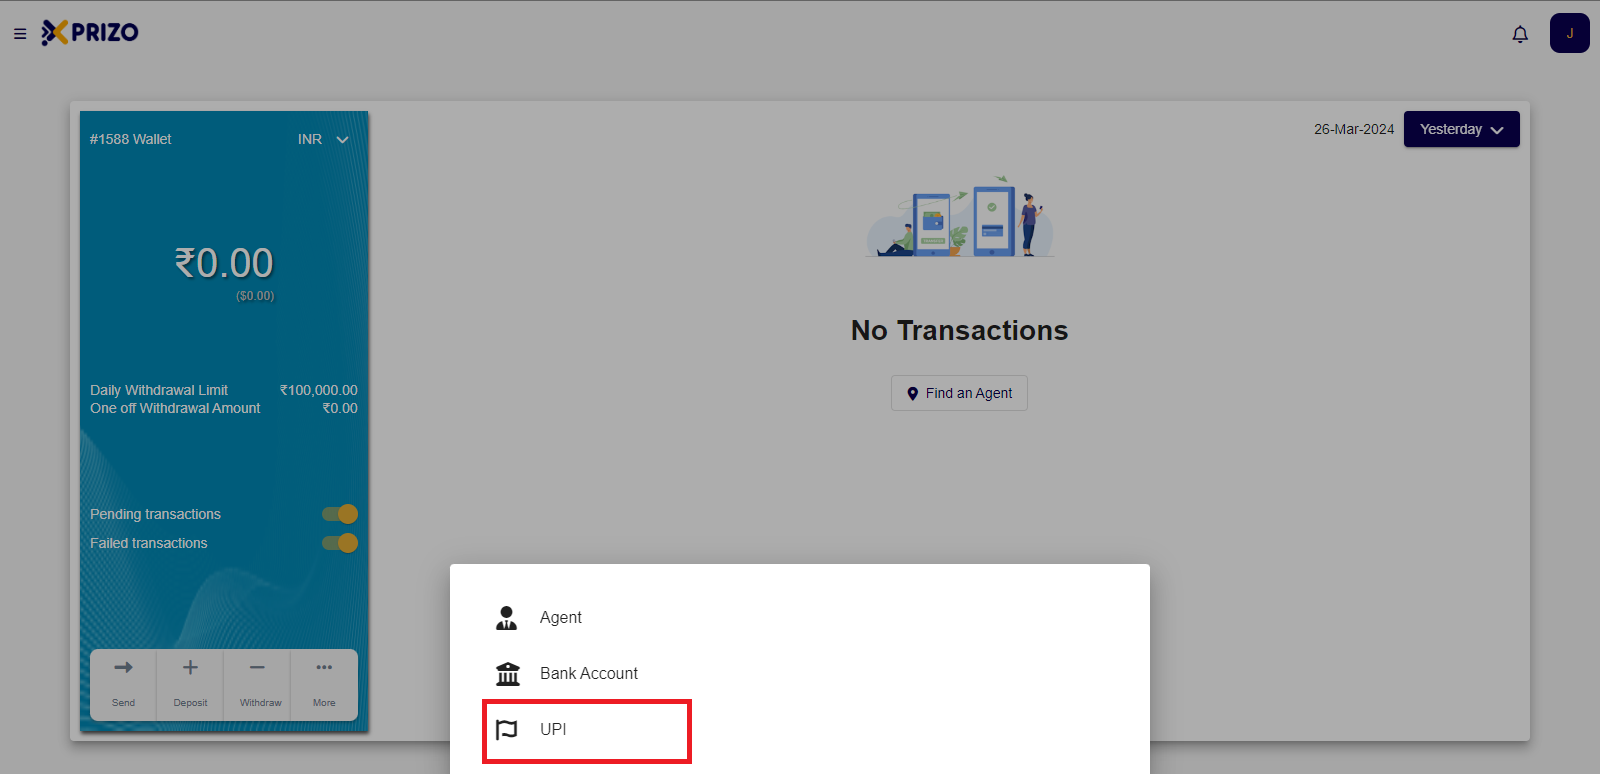
- Select the "UPI" option to proceed with the transaction using UPI.
    
    <div class="w-full text-token-text-primary" data-testid="conversation-turn-526"><div class="px-4 py-2 justify-center text-base md:gap-6 m-auto"><div class="flex flex-1 text-base mx-auto gap-3 md:px-5 lg:px-1 xl:px-5 md:max-w-3xl lg:max-w-[40rem] xl:max-w-[48rem] group">  
    </div></div></div>

![Screenshot 2024-03-27 105019.png](https://books.xprizo.com/uploads/images/gallery/2024-03/scaled-1680-/screenshot-2024-03-27-105019.png)

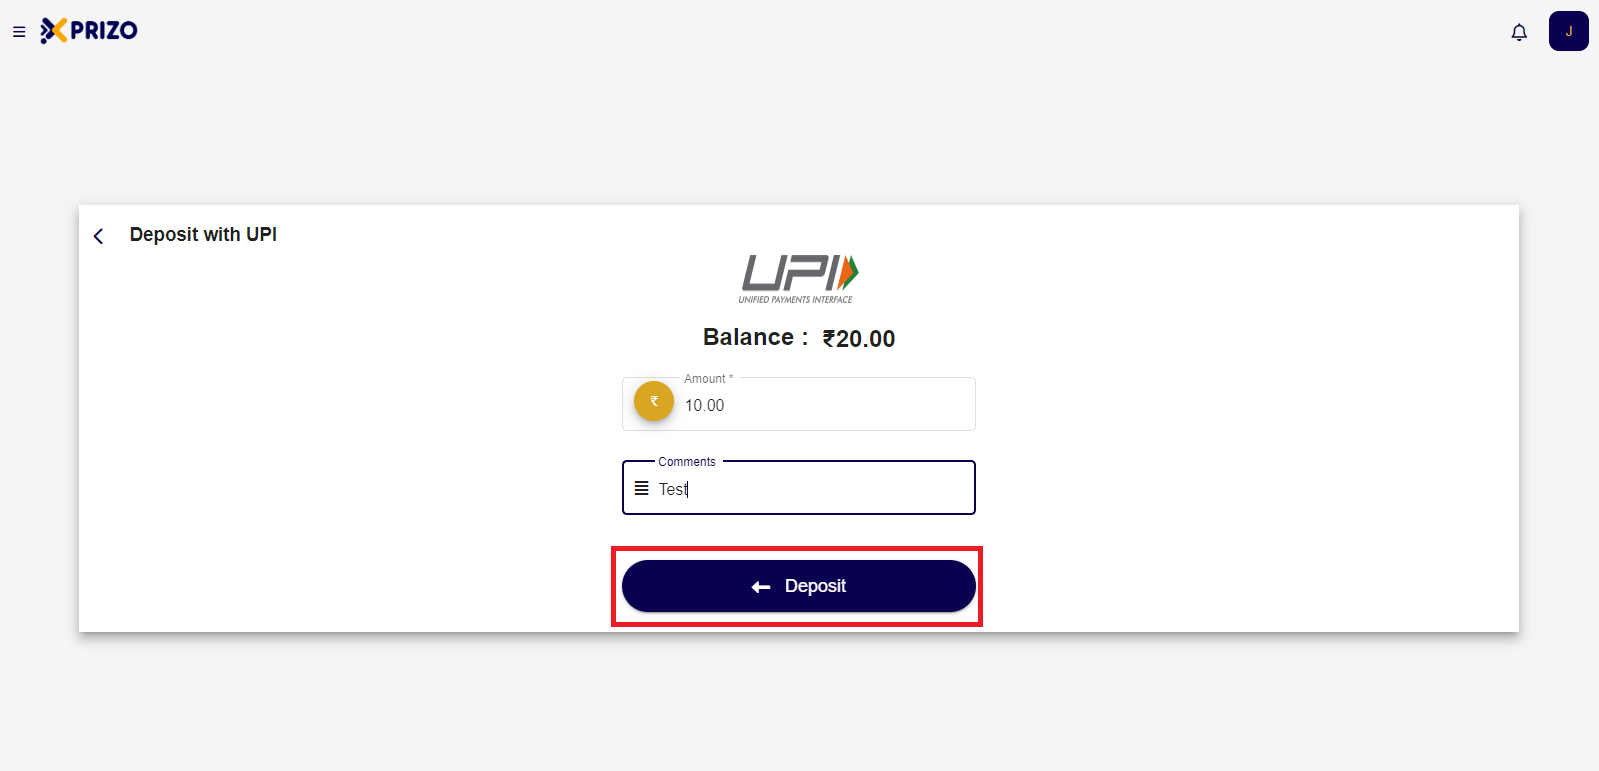
- Enter the desired amount you wish to add to your wallet and provide any additional comments for the transaction if needed.
    
    <div class="w-full text-token-text-primary" data-testid="conversation-turn-528"><div class="px-4 py-2 justify-center text-base md:gap-6 m-auto"><div class="flex flex-1 text-base mx-auto gap-3 md:px-5 lg:px-1 xl:px-5 md:max-w-3xl lg:max-w-[40rem] xl:max-w-[48rem] group">  
    </div></div></div>

![Screenshot 2024-03-27 112733.png](https://books.xprizo.com/uploads/images/gallery/2024-03/scaled-1680-/screenshot-2024-03-27-112733.png)

- Click the "Deposit" button to initiate the transaction process.
    
    <div class="w-full text-token-text-primary" data-testid="conversation-turn-530"><div class="px-4 py-2 justify-center text-base md:gap-6 m-auto"><div class="flex flex-1 text-base mx-auto gap-3 md:px-5 lg:px-1 xl:px-5 md:max-w-3xl lg:max-w-[40rem] xl:max-w-[48rem] group">  
    </div></div></div>

![Screenshot 2024-03-27 112523.png](https://books.xprizo.com/uploads/images/gallery/2024-03/scaled-1680-/screenshot-2024-03-27-112523.png)

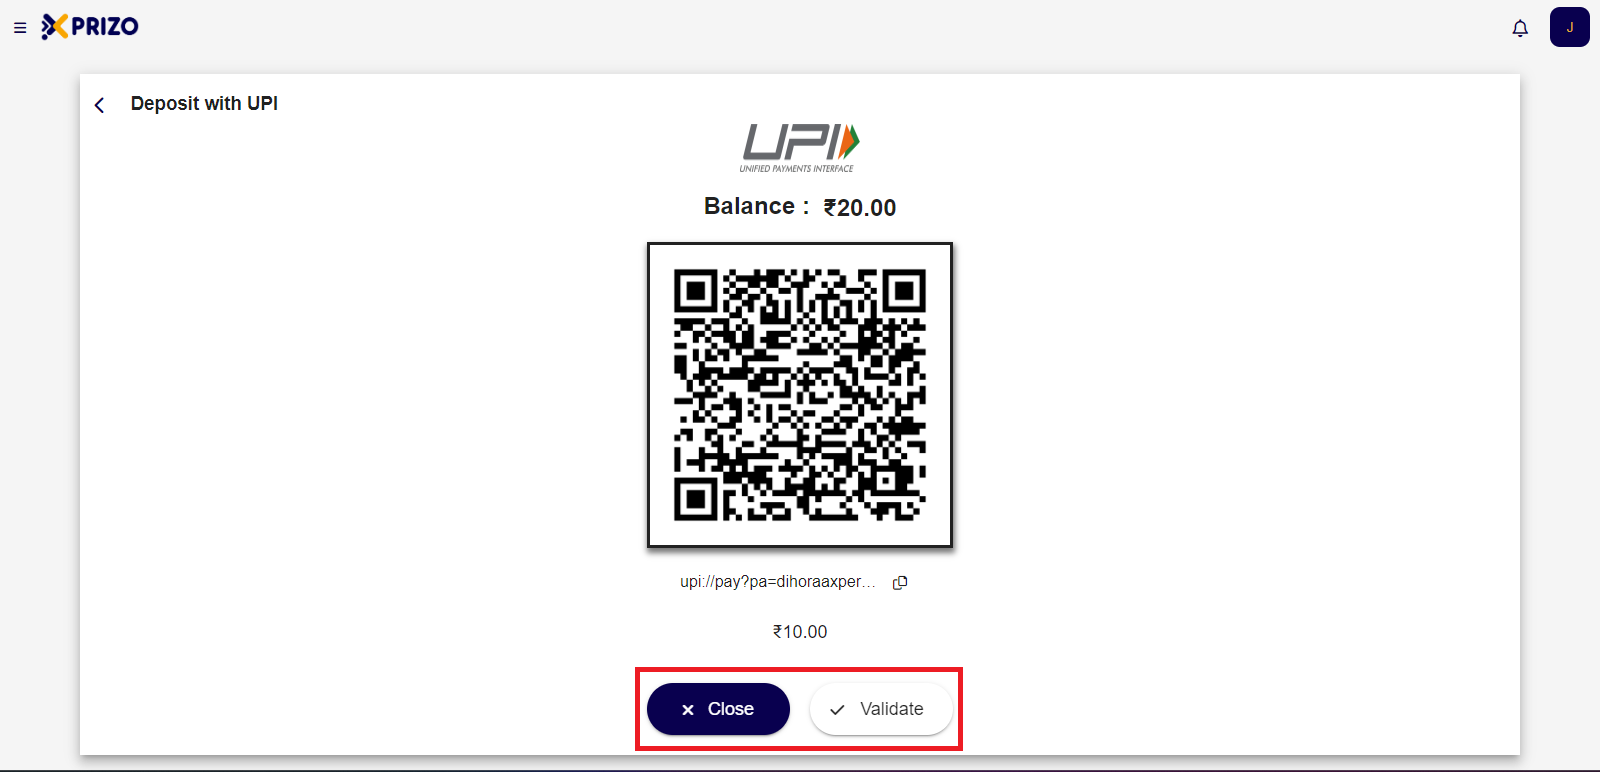
- Next, scan the QR code using your mobile banking application to transfer funds from your bank account to your Xprizo wallet.
    
    <div class="w-full text-token-text-primary" data-testid="conversation-turn-532"><div class="px-4 py-2 justify-center text-base md:gap-6 m-auto"><div class="flex flex-1 text-base mx-auto gap-3 md:px-5 lg:px-1 xl:px-5 md:max-w-3xl lg:max-w-[40rem] xl:max-w-[48rem] group">  
    </div></div></div>

![Screenshot 2024-03-27 112535.png](https://books.xprizo.com/uploads/images/gallery/2024-03/scaled-1680-/screenshot-2024-03-27-112535.png)

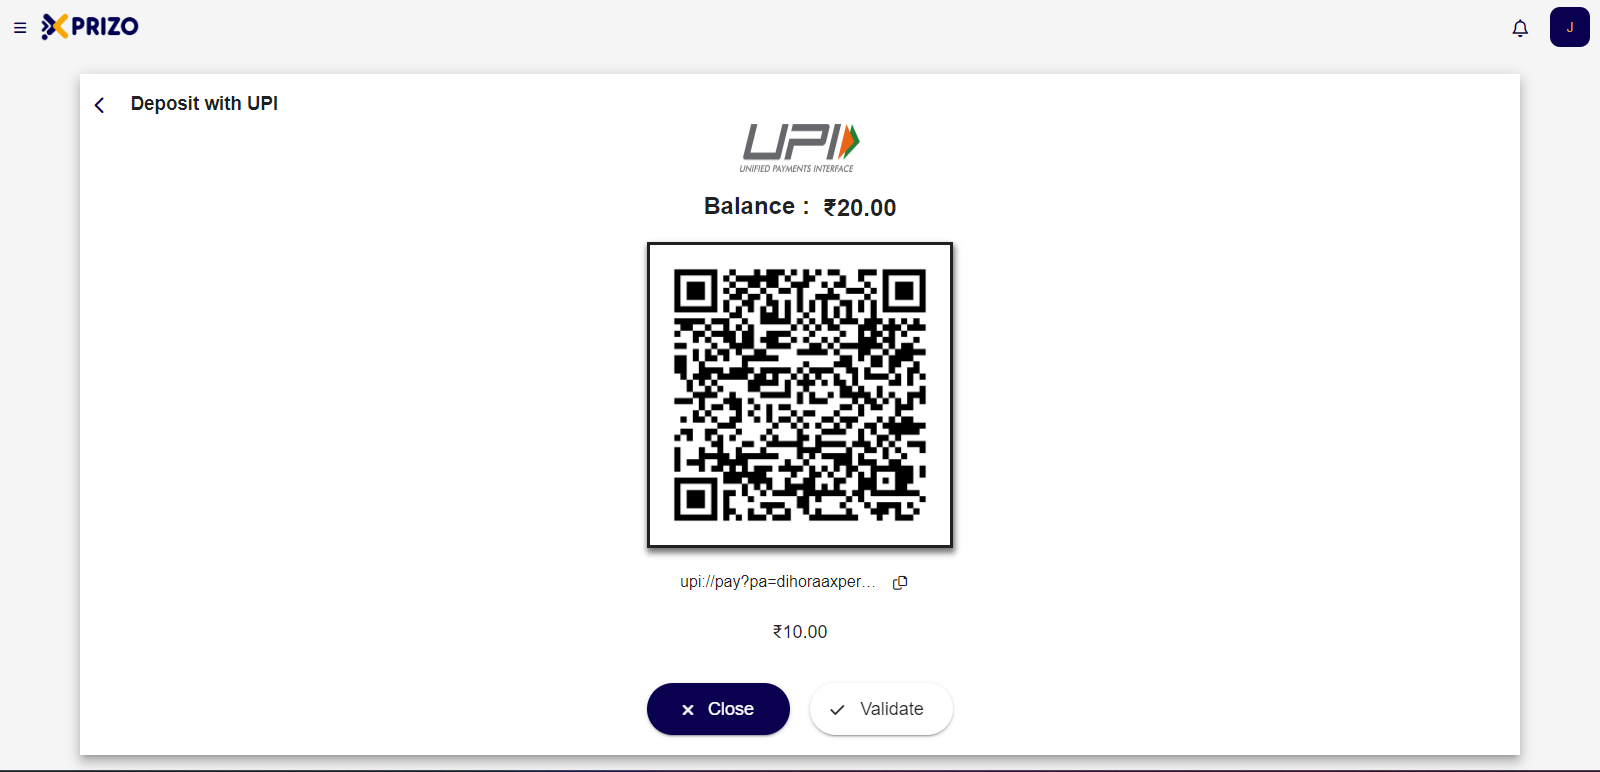
- After completing the payment from your banking app, you can click on "Validate" to confirm if the money has been transferred to your wallet. Alternatively, you can click on "Close" to exit the QR code screen and return to the Dashboard.

![Screenshot 2024-03-27 112535.png](https://books.xprizo.com/uploads/images/gallery/2024-03/scaled-1680-/kknscreenshot-2024-03-27-112535.png)

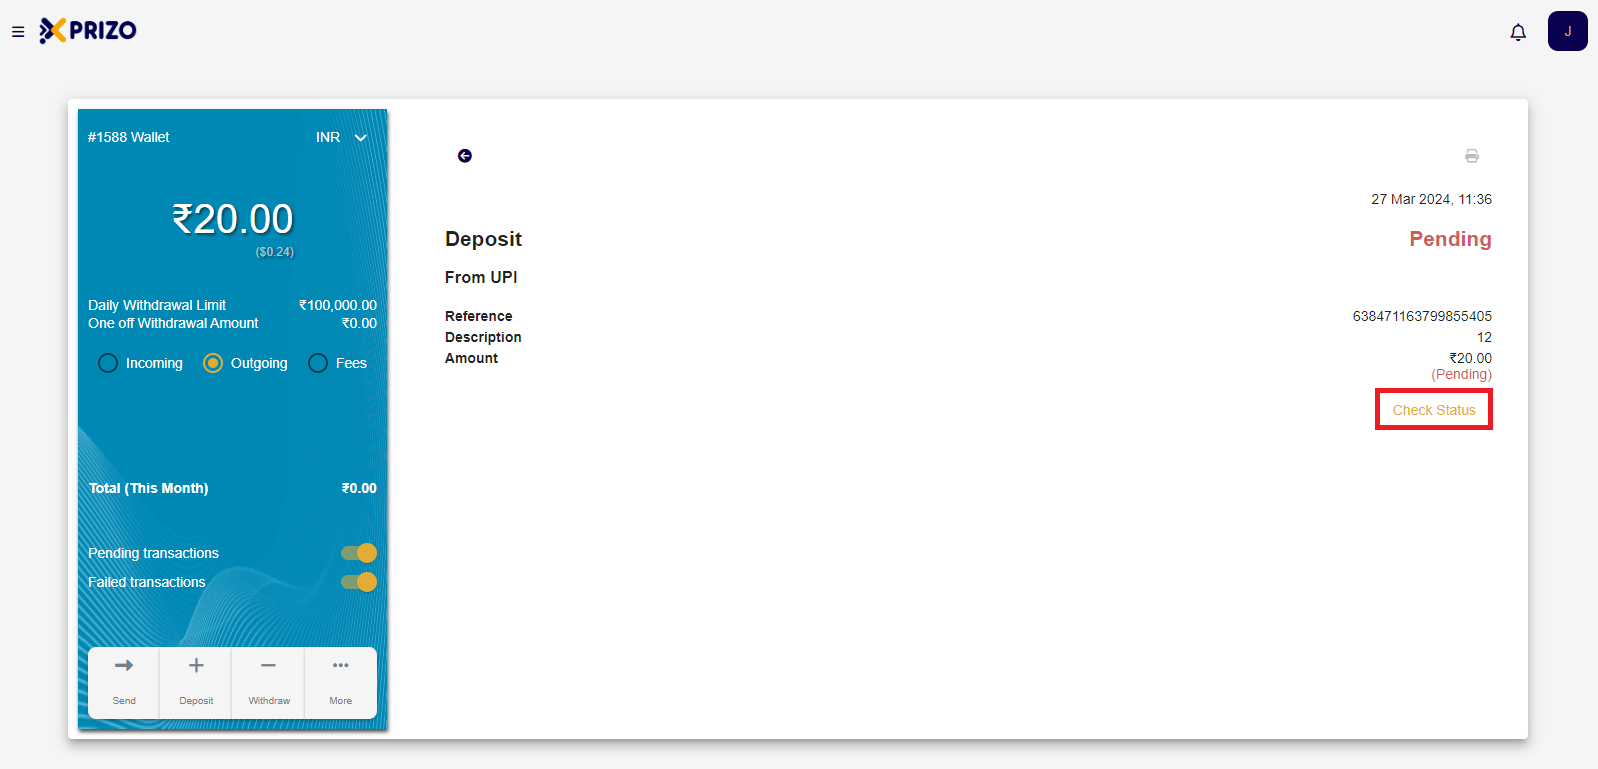
- To review the status of your transaction, return to the dashboard and click on the most recent transaction.

![Screenshot 2024-03-27 114035.png](https://books.xprizo.com/uploads/images/gallery/2024-03/scaled-1680-/screenshot-2024-03-27-114035.png)

- Next, click on the "Check Status" button to verify the status of the transaction.

![Screenshot 2024-03-27 114044.png](https://books.xprizo.com/uploads/images/gallery/2024-03/scaled-1680-/screenshot-2024-03-27-114044.png)

# How to Give Access of Wallet to another User?

### **1. Create a New Account**

- To create a new account follow the steps [<span style="color: #3598db;">here </span>](https://books.xprizo.com/books/user-manual/page/create-a-new-account)and assign a name close to the merchant's name to remember the processor account created for that merchant. For example, if your username is John, the account name could be Johnprocessor.
- You can also use an existing account as a processor account.

**\*Note: This account should not be made a merchant account\***

### **2. Add a Contact**  


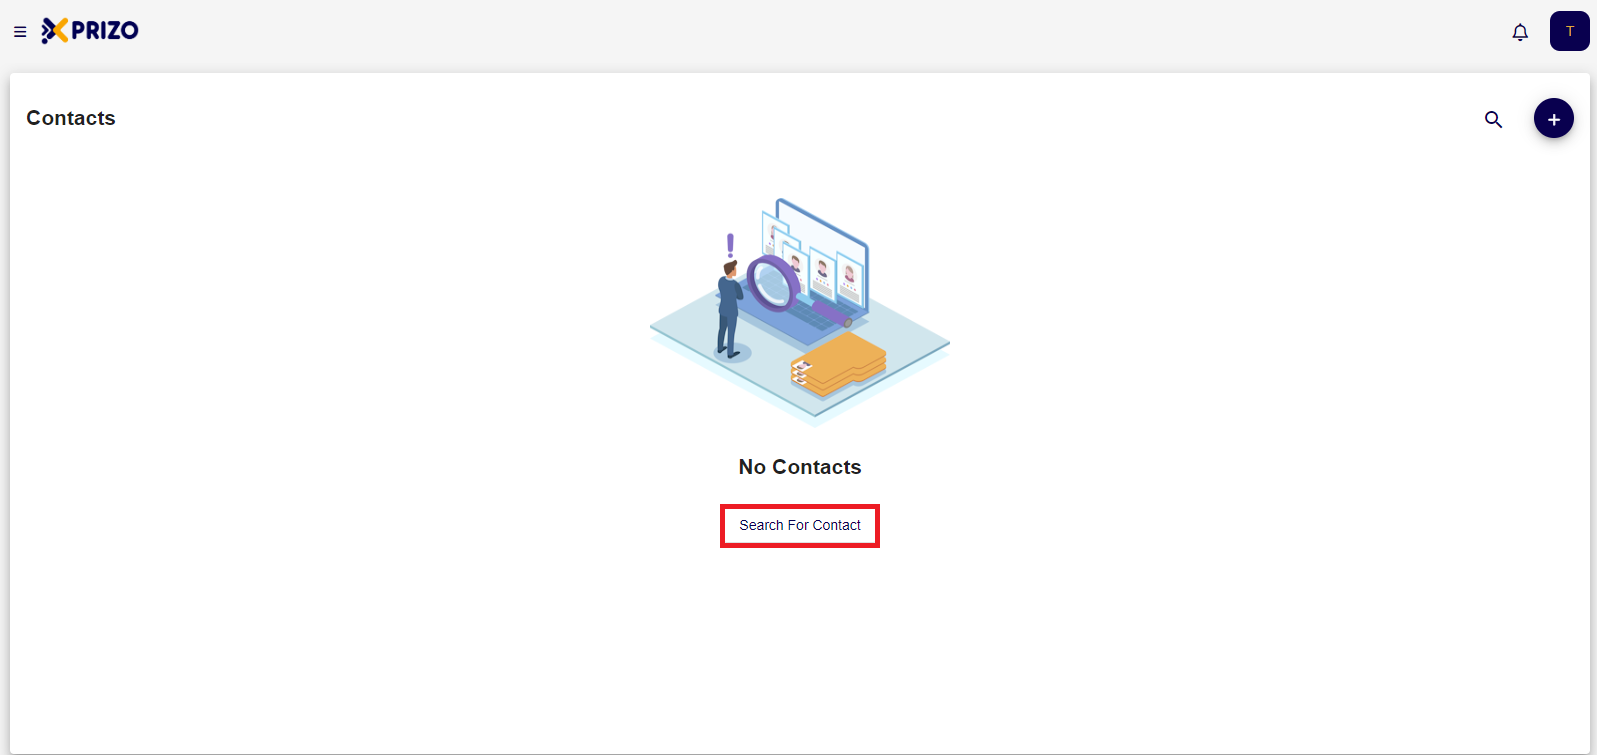
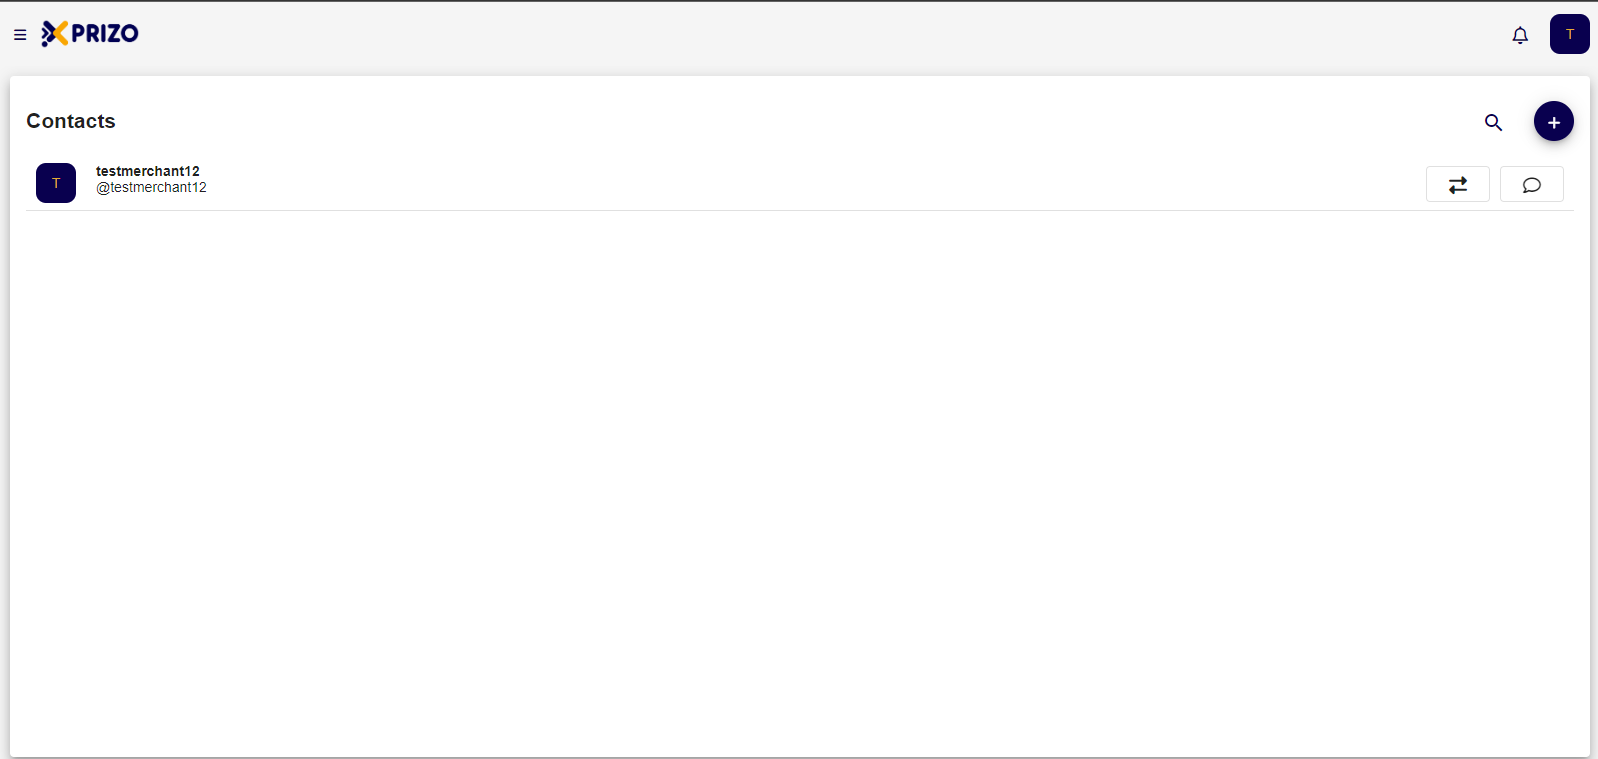
- After creating the account, log in and click on the [![Screenshot 2024-02-06 194645.png](https://books.xprizo.com/uploads/images/gallery/2024-02/scaled-1680-/screenshot-2024-02-06-194645.png)](https://books.xprizo.com/uploads/images/gallery/2024-02/screenshot-2024-02-06-194645.png) icon, then select "Contacts" to add a new contact to your contacts list.

![Screenshot 2024-02-06 195516.png](https://books.xprizo.com/uploads/images/gallery/2024-02/scaled-1680-/screenshot-2024-02-06-195516.png)

- Look up the merchant user for whom this processor account is created by using their username, email, or phone number.

![Screenshot 2024-02-06 195708.png](https://books.xprizo.com/uploads/images/gallery/2024-02/scaled-1680-/screenshot-2024-02-06-195708.png)

- Click on the "Add" button to send a friend request to that user.

![Screenshot 2024-02-06 195843.png](https://books.xprizo.com/uploads/images/gallery/2024-02/scaled-1680-/screenshot-2024-02-06-195843.png)

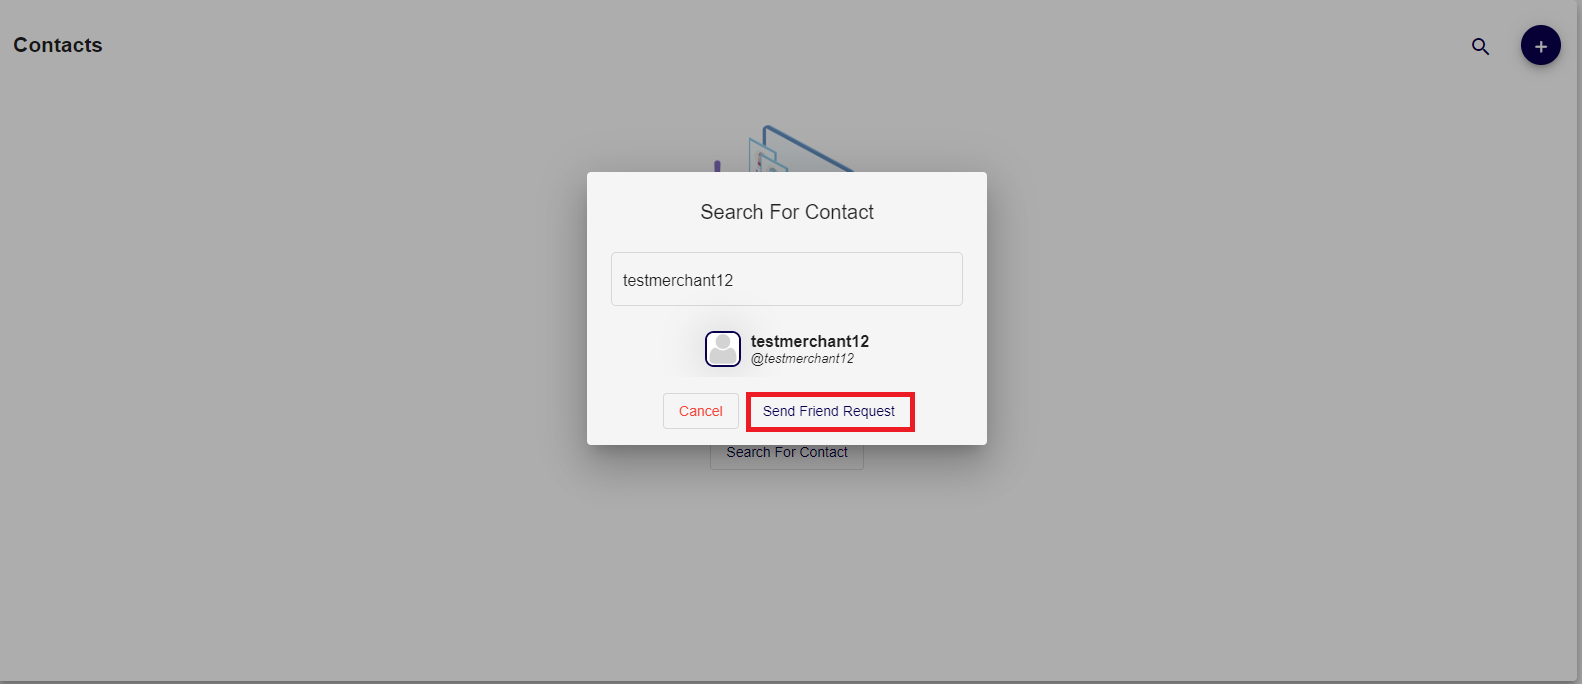
- Once the request is accepted that user will be added to your contact list.

![Screenshot 2024-02-06 200339.png](https://books.xprizo.com/uploads/images/gallery/2024-02/scaled-1680-/screenshot-2024-02-06-200339.png)

### **3. Share Wallet Access**

The wallet owner can share and grant access to their wallet, and they can revoke it at any time. To share your wallet, the person must be an active user in your contacts list.

- Log in with the Merchant account, go to the Contacts section, and select the processor account user created for this merchant account to open their contact details.
    
    <div class="w-full pt-2 md:pt-0 dark:border-white/20 md:border-transparent md:dark:border-transparent md:w-[calc(100%-.5rem)]"><form class="stretch mx-2 flex flex-row gap-3 last:mb-2 md:mx-4 md:last:mb-6 lg:mx-auto lg:max-w-2xl xl:max-w-3xl"></form>  
    </div>

![Screenshot 2024-02-06 201015.png](https://books.xprizo.com/uploads/images/gallery/2024-02/scaled-1680-/screenshot-2024-02-06-201015.png)

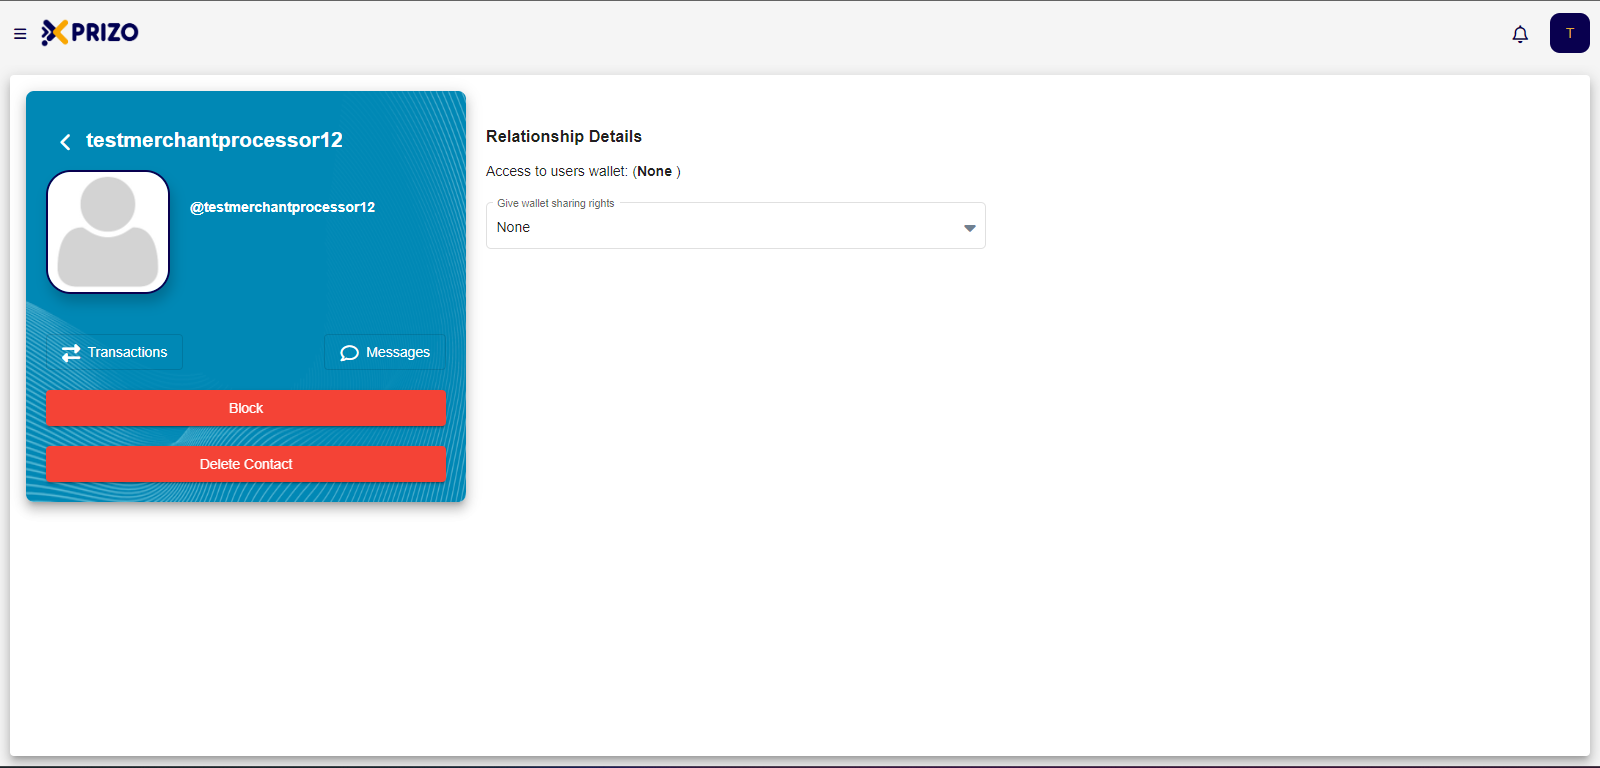
- Choose "Full" to grant complete access to the merchant's wallet. You can also provide other types of access to the merchant's wallet.
    
    <div class="w-full pt-2 md:pt-0 dark:border-white/20 md:border-transparent md:dark:border-transparent md:w-[calc(100%-.5rem)]"><form class="stretch mx-2 flex flex-row gap-3 last:mb-2 md:mx-4 md:last:mb-6 lg:mx-auto lg:max-w-2xl xl:max-w-3xl"></form>  
    </div>

![Screenshot 2024-02-06 200241.png](https://books.xprizo.com/uploads/images/gallery/2024-02/scaled-1680-/screenshot-2024-02-06-200241.png)

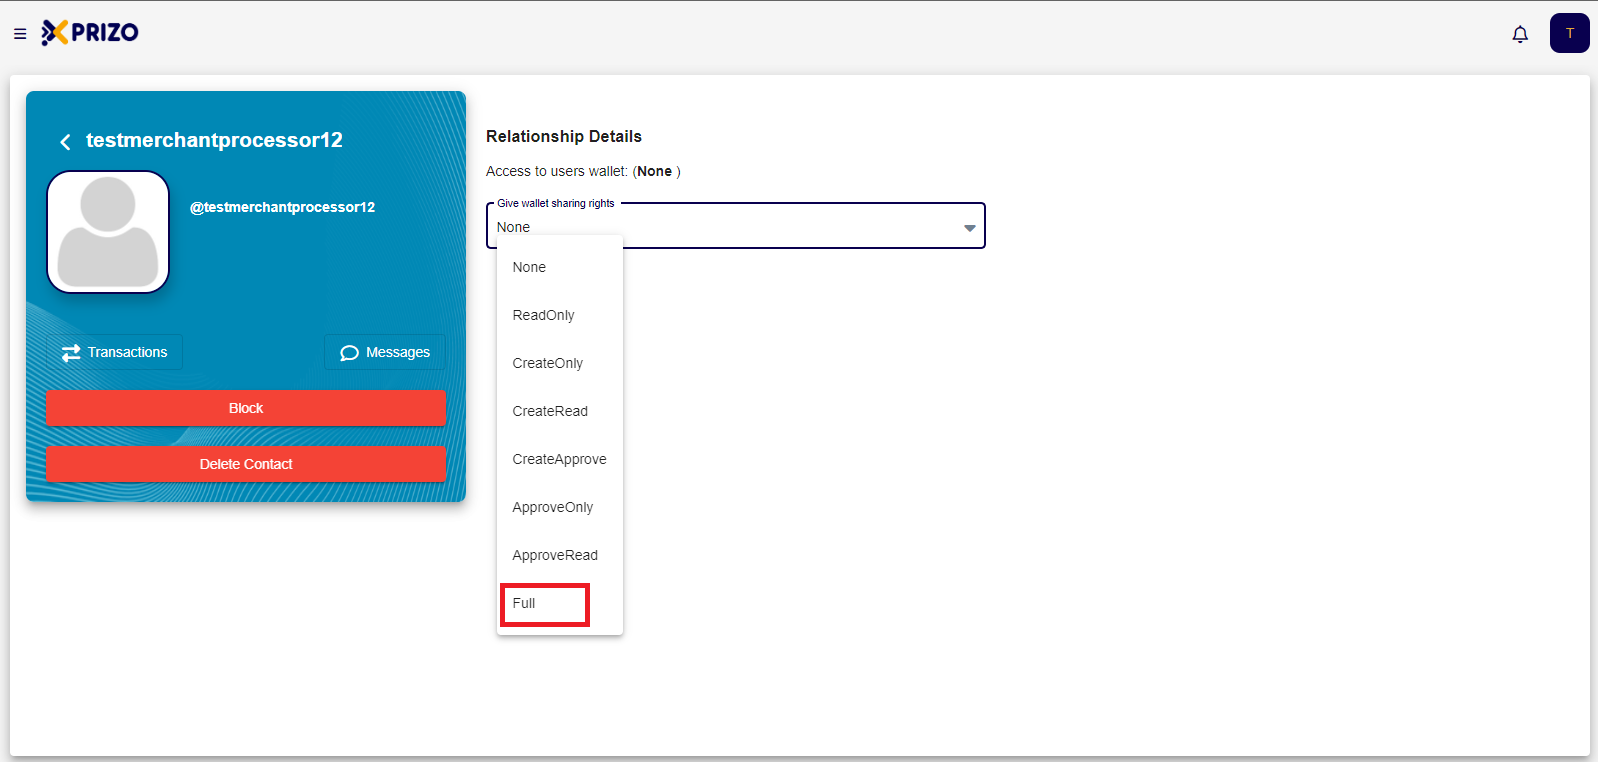
The following is the type of access you can grant:

- None - They have no access to your wallets.
- ReadOnly - They can only view your wallet balances and transactions.
- CreateOnly - They can create new transactions on your wallet.
- CreateRead - They can view the details of transactions created on your wallet.
- CreateApprove - They can approve new transactions on your wallet.
- ApproveOnly - They can approve an existing pending transaction on your wallet.
- ApproveRead - They can view the details of pending transactions on your wallet.
- Full - They have full access to your wallet.

# How to do Wallet to Wallet Transfer?

- Sign in to your account using your login credentials.
    
    <div class="w-full text-token-text-primary" data-testid="conversation-turn-646"><div class="px-4 py-2 justify-center text-base md:gap-6 m-auto"><div class="flex flex-1 text-base mx-auto gap-3 md:px-5 lg:px-1 xl:px-5 md:max-w-3xl lg:max-w-[40rem] xl:max-w-[48rem] group"><div class="flex-shrink-0 flex flex-col relative items-end"><div></div></div></div></div></div>

- To transfer funds from one wallet to another, click on "More."
    
    <div class="w-full pt-2 md:pt-0 dark:border-white/20 md:border-transparent md:dark:border-transparent md:w-[calc(100%-.5rem)]"><form class="stretch mx-2 flex flex-row gap-3 last:mb-2 md:mx-4 md:last:mb-6 lg:mx-auto lg:max-w-2xl xl:max-w-3xl"></form></div>

- Choose "Wallet Transfer" to initiate a transfer from one wallet to another, enabling you to move funds between your wallets.
    
    <div class="w-full text-token-text-primary" data-testid="conversation-turn-650"><div class="px-4 py-2 justify-center text-base md:gap-6 m-auto"><div class="flex flex-1 text-base mx-auto gap-3 md:px-5 lg:px-1 xl:px-5 md:max-w-3xl lg:max-w-[40rem] xl:max-w-[48rem] group"><div class="flex-shrink-0 flex flex-col relative items-end"><div></div></div></div></div></div>

- Choose the wallet where you want to transfer your funds.
    
    <div class="w-full text-token-text-primary" data-testid="conversation-turn-652"><div class="px-4 py-2 justify-center text-base md:gap-6 m-auto"><div class="flex flex-1 text-base mx-auto gap-3 md:px-5 lg:px-1 xl:px-5 md:max-w-3xl lg:max-w-[40rem] xl:max-w-[48rem] group"><div class="flex-shrink-0 flex flex-col relative items-end"><div></div></div></div></div></div>

- If the selected wallet uses a different currency, the entered amount will be automatically converted to that currency for the transfer.
    
    <div class="w-full text-token-text-primary" data-testid="conversation-turn-654"><div class="px-4 py-2 justify-center text-base md:gap-6 m-auto"><div class="flex flex-1 text-base mx-auto gap-3 md:px-5 lg:px-1 xl:px-5 md:max-w-3xl lg:max-w-[40rem] xl:max-w-[48rem] group"><div class="flex-shrink-0 flex flex-col relative items-end"><div></div></div></div></div></div>

- You also have the option to include comments with the transfer you're initiating.
    
    <div class="w-full pt-2 md:pt-0 dark:border-white/20 md:border-transparent md:dark:border-transparent md:w-[calc(100%-.5rem)]"><form class="stretch mx-2 flex flex-row gap-3 last:mb-2 md:mx-4 md:last:mb-6 lg:mx-auto lg:max-w-2xl xl:max-w-3xl"></form></div>

- After completing the necessary details, click on the "Wallet Transfer" button to initiate the transfer of your funds.
    
    <div class="w-full text-token-text-primary" data-testid="conversation-turn-658"><div class="px-4 py-2 justify-center text-base md:gap-6 m-auto"><div class="flex flex-1 text-base mx-auto gap-3 md:px-5 lg:px-1 xl:px-5 md:max-w-3xl lg:max-w-[40rem] xl:max-w-[48rem] group"><div class="flex-shrink-0 flex flex-col relative items-end"><div></div></div></div></div></div>

- Afterward, you will be redirected to the dashboard to view your recent transactions.
    
    <div class="w-full text-token-text-primary" data-testid="conversation-turn-660"><div class="px-4 py-2 justify-center text-base md:gap-6 m-auto"><div class="flex flex-1 text-base mx-auto gap-3 md:px-5 lg:px-1 xl:px-5 md:max-w-3xl lg:max-w-[40rem] xl:max-w-[48rem] group"><div class="flex-shrink-0 flex flex-col relative items-end"><div></div></div></div></div></div>

- To finalize the transaction, click on the checkmark. If you wish to decline the payment, click on the cross.
    
    <div class="w-full text-token-text-primary" data-testid="conversation-turn-662"><div class="px-4 py-2 justify-center text-base md:gap-6 m-auto"><div class="flex flex-1 text-base mx-auto gap-3 md:px-5 lg:px-1 xl:px-5 md:max-w-3xl lg:max-w-[40rem] xl:max-w-[48rem] group"><div class="flex-shrink-0 flex flex-col relative items-end"><div></div></div></div></div></div>

- Once completed, the funds will be transferred to the other wallet.
    
    <div class="w-full pt-2 md:pt-0 dark:border-white/20 md:border-transparent md:dark:border-transparent md:w-[calc(100%-.5rem)]"><form class="stretch mx-2 flex flex-row gap-3 last:mb-2 md:mx-4 md:last:mb-6 lg:mx-auto lg:max-w-2xl xl:max-w-3xl"></form></div>

# How to Manage Savings Wallet?

- Sign in using your credentials to access your account.

- To access your savings wallet, navigate to the "More" menu and select "Savings" to open your savings wallet.

<p class="callout info">When you access your savings wallet within any currency wallet, a wallet for that specific currency will be automatically created if it hasn't been previously.</p>

- To switch between wallets within your savings wallet, simply click on the currency displayed at the top and select the desired wallet from the list.

- To deposit funds into your savings wallet, click on "Deposit," enter the desired amount, and click "Confirm" to add the specified amount to your savings wallet.
    
    <div class="w-full text-token-text-primary" data-testid="conversation-turn-684"><div class="px-4 py-2 justify-center text-base md:gap-6 m-auto"><div class="flex flex-1 text-base mx-auto gap-3 md:px-5 lg:px-1 xl:px-5 md:max-w-3xl lg:max-w-[40rem] xl:max-w-[48rem] group"><div class="flex-shrink-0 flex flex-col relative items-end"><div>  
    </div></div></div></div></div>

- After confirming, you'll notice a pending transaction in your recent transactions. To finalize the transaction and add the funds to your wallet, click on the checkmark icon. Alternatively, if you wish to decline the payment, click on the cross icon to discard it.
    
    <div class="w-full text-token-text-primary" data-testid="conversation-turn-686"><div class="px-4 py-2 justify-center text-base md:gap-6 m-auto"><div class="flex flex-1 text-base mx-auto gap-3 md:px-5 lg:px-1 xl:px-5 md:max-w-3xl lg:max-w-[40rem] xl:max-w-[48rem] group"><div class="flex-shrink-0 flex flex-col relative items-end"><div>  
    </div></div></div></div></div>

- Once you've confirmed the transaction, the funds will be reflected in your savings wallet.

- To withdraw funds from your savings wallet, enter the desired amount and click "Confirm" to proceed with the withdrawal.

- After that, click on the checkmark icon to confirm the withdrawal request, or click on the cross icon to discard the withdrawal process.

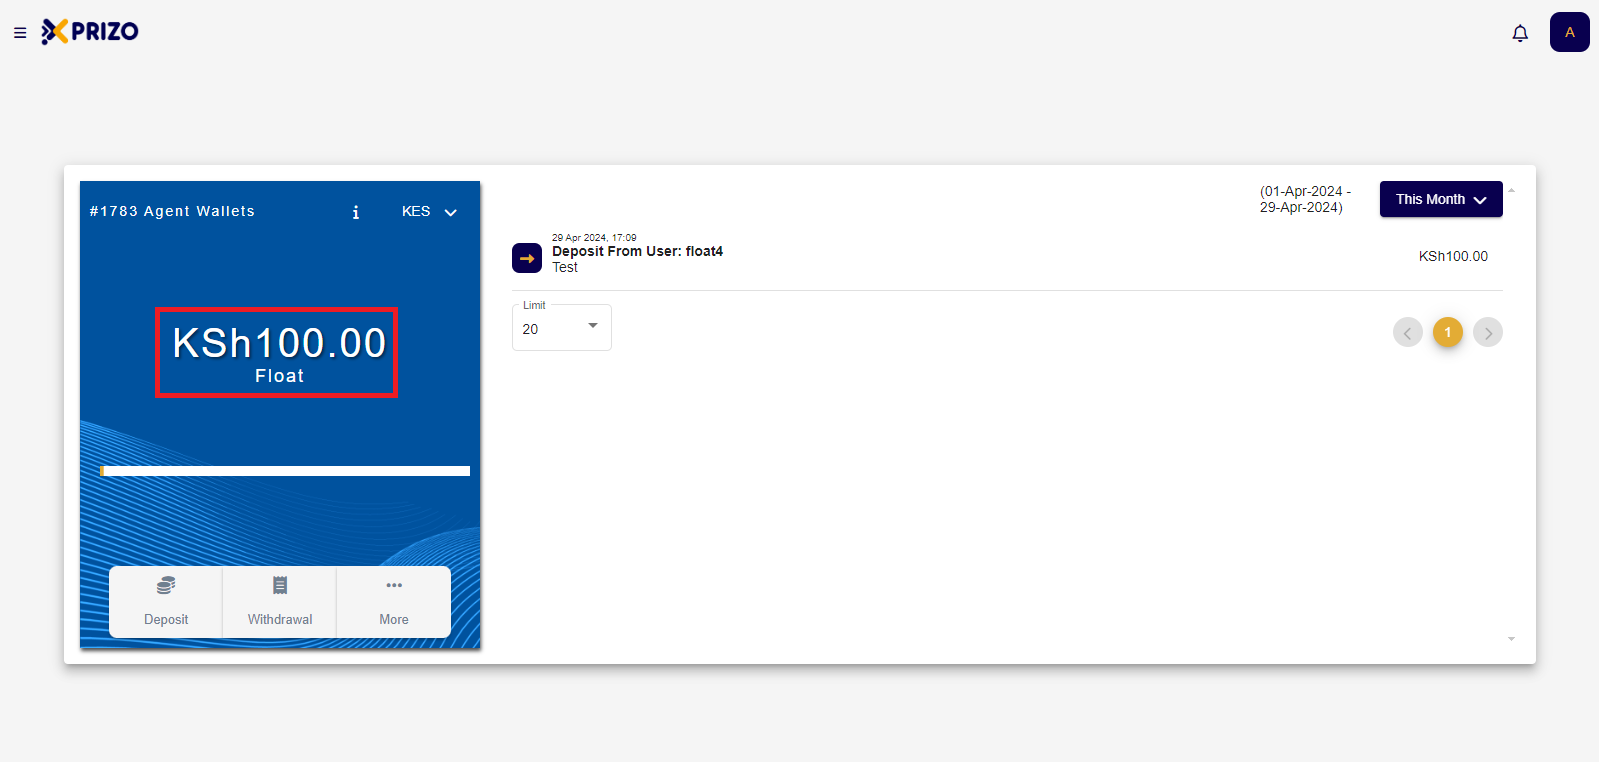
# How to use Float in Agent Wallet?

- Sign in to your account with your credentials, then access the agent wallets section by clicking on the hamburger menu.

![Screenshot 2024-04-05 125722.png](https://books.xprizo.com/uploads/images/gallery/2024-04/scaled-1680-/screenshot-2024-04-05-125722.png)

- Navigate to the "More" option and choose "Float".

- Select the "Top up" option to add funds to your agent wallet from your user wallet.

![Screenshot 2024-04-05 130558.png](https://books.xprizo.com/uploads/images/gallery/2024-04/scaled-1680-/screenshot-2024-04-05-130558.png)

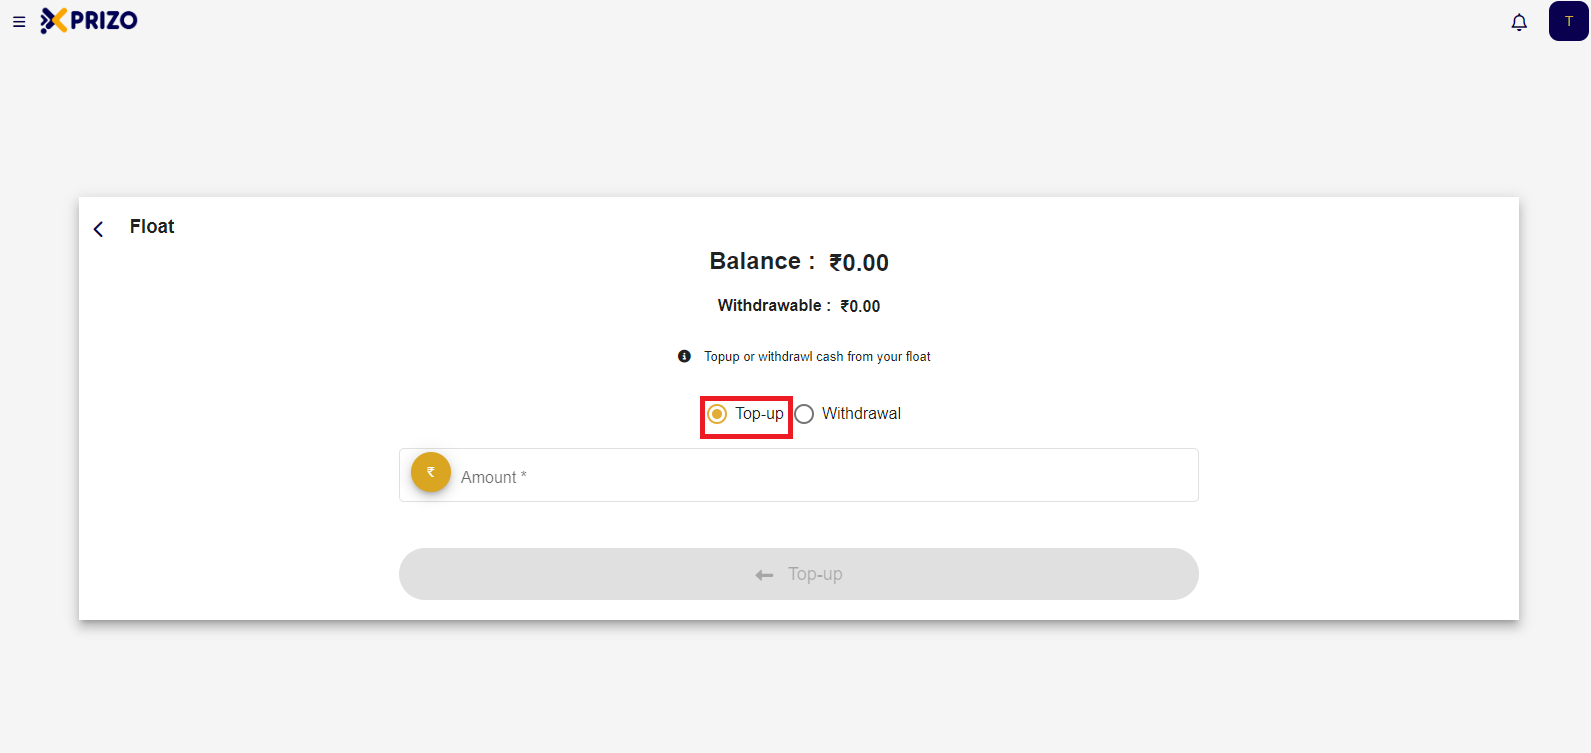
- Next, input the desired amount into the designated text field.
    
    <div class="w-full text-token-text-primary" data-testid="conversation-turn-702"><div class="px-4 py-2 justify-center text-base md:gap-6 m-auto"><div class="flex flex-1 text-base mx-auto gap-3 md:px-5 lg:px-1 xl:px-5 md:max-w-3xl lg:max-w-[40rem] xl:max-w-[48rem] group">  
    </div></div></div>

![Screenshot 2024-04-05 130608.png](https://books.xprizo.com/uploads/images/gallery/2024-04/scaled-1680-/screenshot-2024-04-05-130608.png)

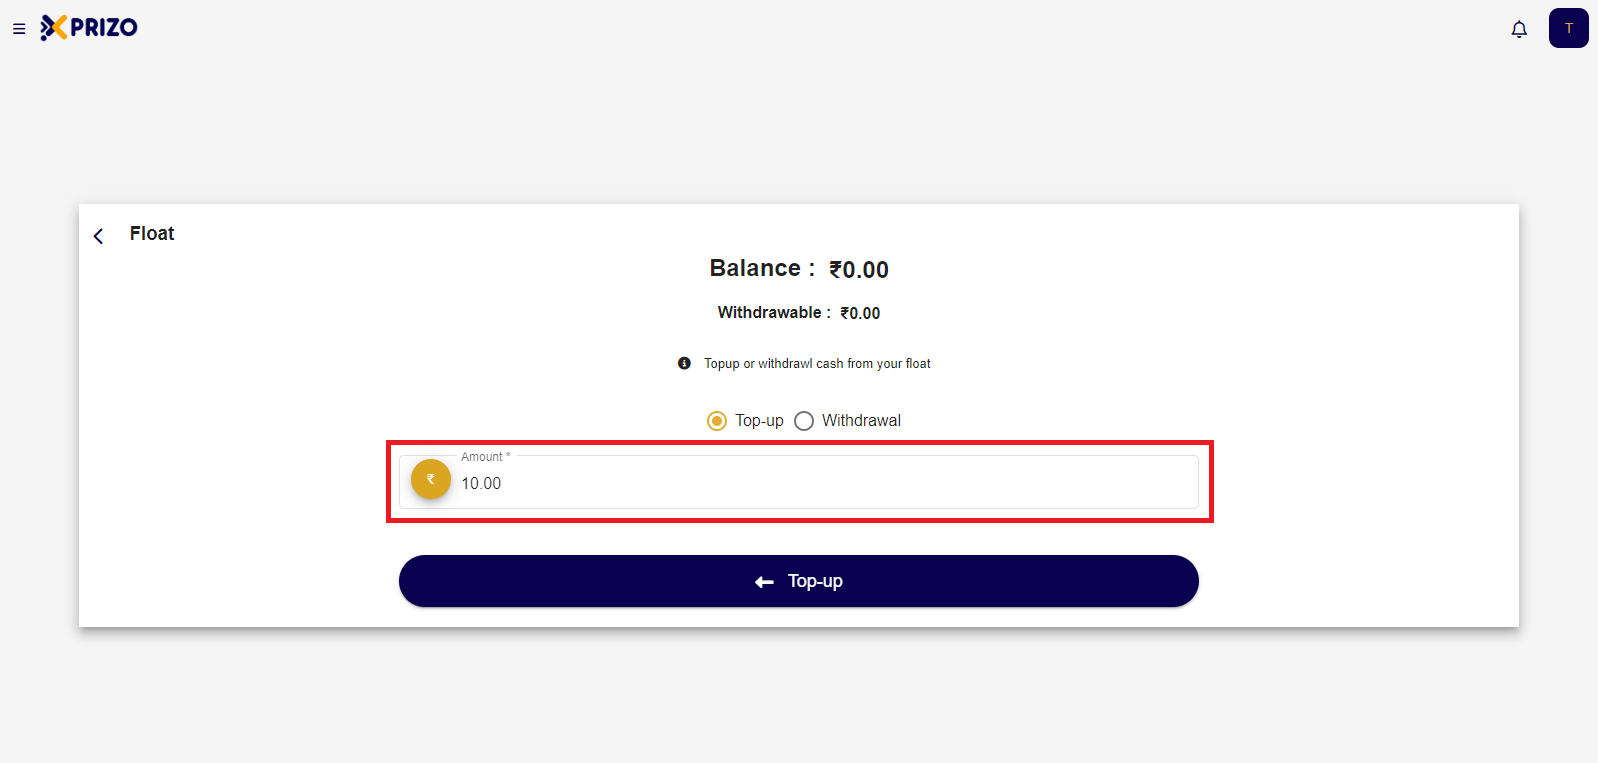
- Click on the Top-up button to add the entered money to your agent wallet.

- You'll then return to the agent wallet screen where the latest transaction request will be displayed. Click the check mark to confirm the transaction or select the cross to discard it.

- Upon approval, the funds will be deposited into your agent's wallet.
    
    <div class="w-full text-token-text-primary" data-testid="conversation-turn-706"><div class="px-4 py-2 justify-center text-base md:gap-6 m-auto"><div class="flex flex-1 text-base mx-auto gap-3 md:px-5 lg:px-1 xl:px-5 md:max-w-3xl lg:max-w-[40rem] xl:max-w-[48rem] group">  
    </div></div></div>

- To initiate a withdrawal, access the "More" menu and return to the float screen. Then, select the withdrawal option by clicking on the corresponding radio button.

- Next, input the desired amount into the designated field and proceed by clicking on the "Withdrawal" button.

- To approve the transaction, click on the checkmark icon. If you wish to discard the transaction, click on the cross icon.

- After approval, the funds will be withdrawn from the agent wallet and transferred to the user wallet.

# How to Manage Agent Wallet?

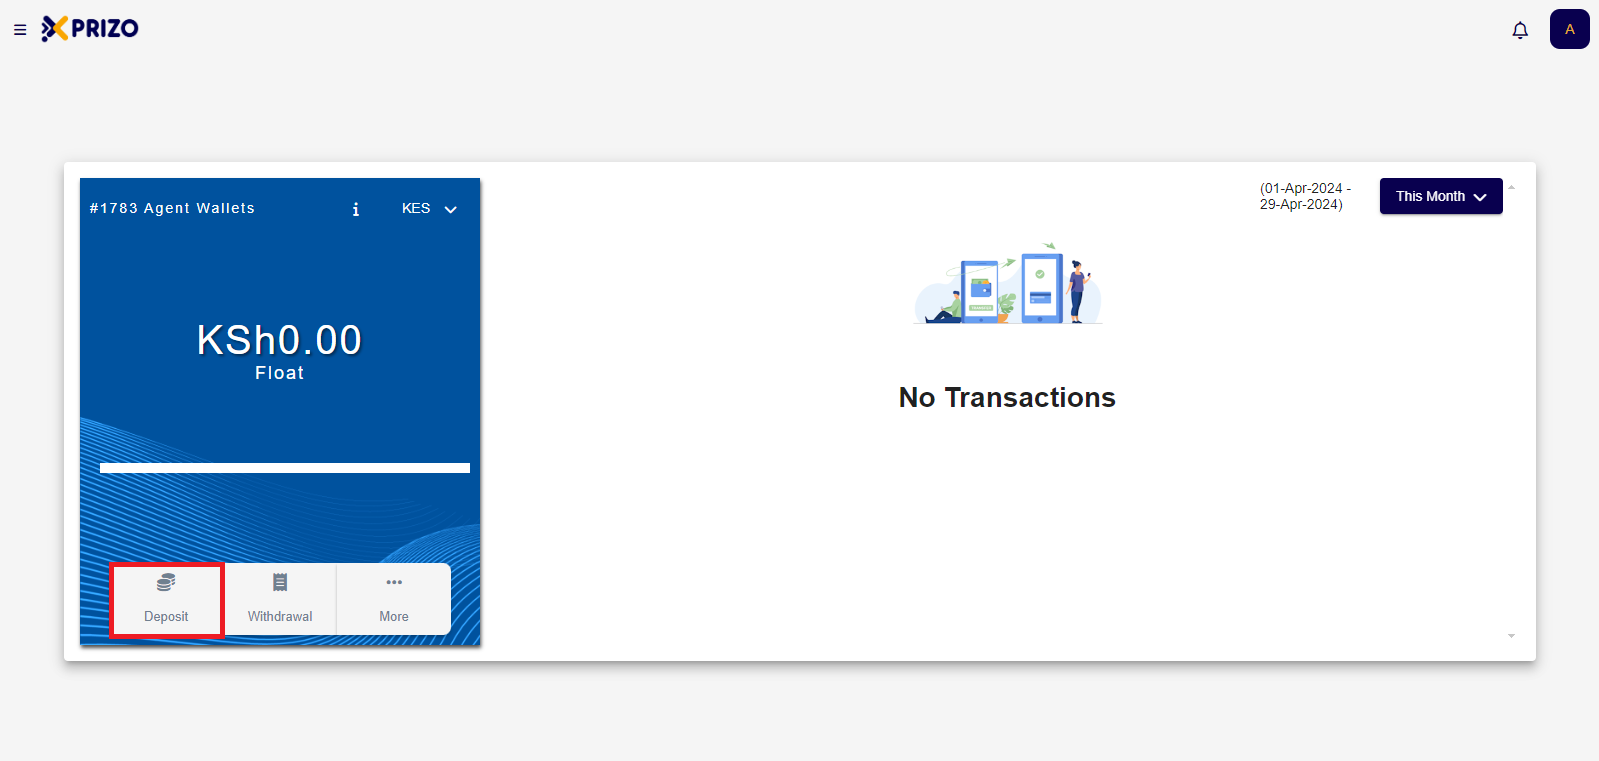
- Login to your account using your credentials and click on the hamburger menu to open Agent Wallets.

![Screenshot 2024-04-29 170438.png](https://books.xprizo.com/uploads/images/gallery/2024-04/scaled-1680-/screenshot-2024-04-29-170438.png)

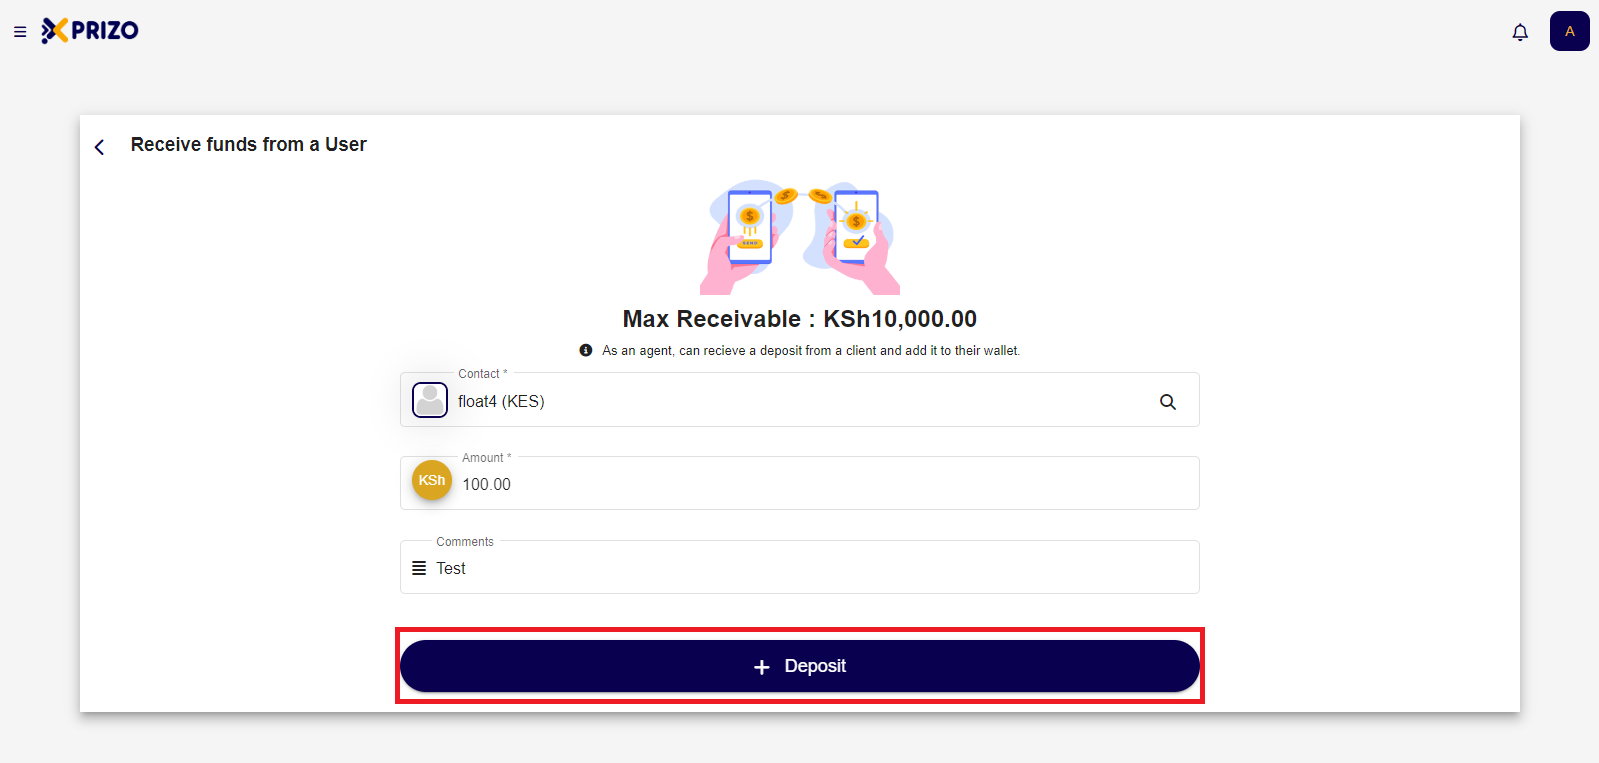
- Click on Deposit to receive funds from a user, funds received from a user will add the same funds to their user's wallet.

![Screenshot 2024-04-29 170643.png](https://books.xprizo.com/uploads/images/gallery/2024-04/scaled-1680-/screenshot-2024-04-29-170643.png)

- Choose the person you want to send money to from your contacts or search for them. Enter the amount of money they're giving you in the "amount" field. You can also add a note if needed. Click "Deposit" to accept the money and add it to their wallet.
    
    <div class="w-full pt-2 md:pt-0 dark:border-white/20 md:border-transparent md:dark:border-transparent md:w-[calc(100%-.5rem)]"><form class="stretch mx-2 flex flex-row gap-3 last:mb-2 md:mx-4 md:last:mb-6 lg:mx-auto lg:max-w-2xl xl:max-w-3xl"></form></div>

![Screenshot 2024-04-29 170758.png](https://books.xprizo.com/uploads/images/gallery/2024-04/scaled-1680-/screenshot-2024-04-29-170758.png)

- You will then be redirected to the Agent wallet screen where you will have to approve the transaction in the recent transactions screen. Click the check mark to approve the transaction or if you wish to discard the transaction click on cross to discard the transaction.

![Screenshot 2024-04-29 170945.png](https://books.xprizo.com/uploads/images/gallery/2024-04/scaled-1680-/screenshot-2024-04-29-170945.png)

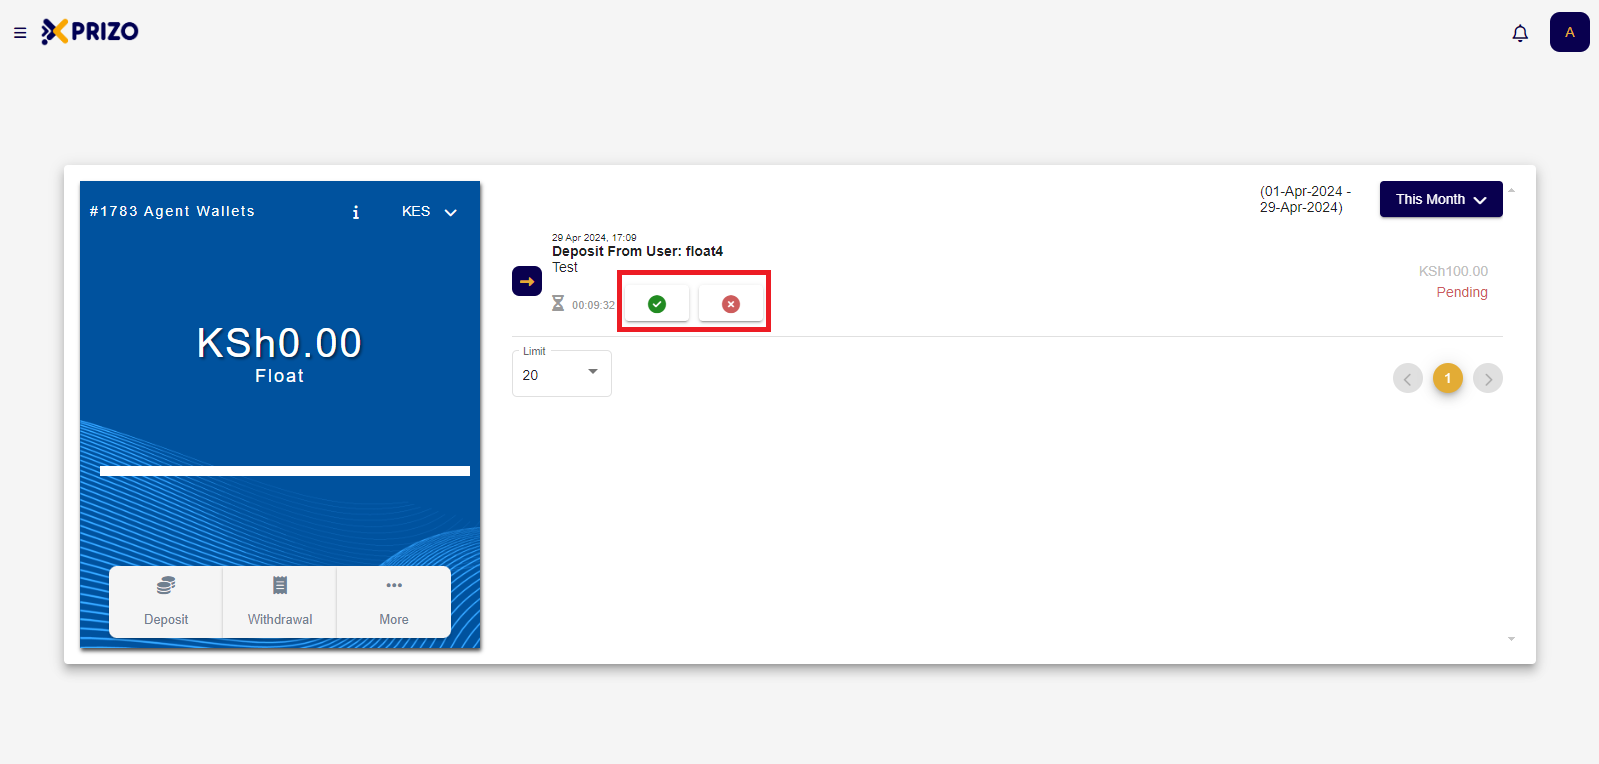
- Once approved funds received will be added to your agent wallet and the same amount will reflect on the user's wallet as well from whom we received the funds.

![Screenshot 2024-04-29 171001.png](https://books.xprizo.com/uploads/images/gallery/2024-04/scaled-1680-/screenshot-2024-04-29-171001.png)

# How to do Deposit using M-Pesa?

- Login to your account using your credentials and click on the Deposit to deposit money to your wallet.
- Then select M-Pesa from the options shown.
- Then select the country with its country code in the prefix dropdown and then enter the mobile number in the mobile number text field.
- Then enter the amount in the amount field and you also add comments if you wish to.

# How to Send Money to another User?

- Login to your account using your credentials, and click on Send to send money to another user.
- Enter the name of the user you want to send the money to if that user is not added in your contact list then click on the search icon and then enter the name in the popup and search for that user.
- Then enter the amount in the amount field and you can also add the message if you want to.
- Once done click on the Send Payment button to send the money to that user.